
Table of Contents
#AAPickerView


##Description
AAPickerView is simple and easy-to-use implementation for UITextField to use as UIPickerView and UIDatePicker written in swift. It allows to transform UITextField as UIPickerView and UIDatePicker to pick data easily. It is designed to present a picker view to select data in UITextField.
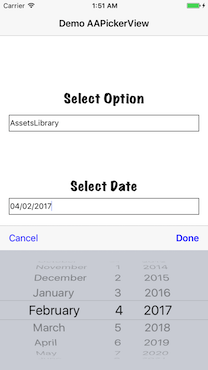
##Demonstration

To run the example project, clone the repo, and run pod install from the Example directory first.
##Requirements
- iOS 8.0+
- Xcode 8.0+
Installation
AAPickerView can be installed using CocoaPods, Carthage, or manually.
##CocoaPods
AAPickerView is available through CocoaPods. To install CocoaPods, run:
$ gem install cocoapods
Then create a Podfile with the following contents:
source 'https://github.com/CocoaPods/Specs.git'
platform :ios, '8.0'
use_frameworks!

target '<Your Target Name>' do
// Swift 3.2+ Compatibility
pod 'AAPickerView'
// Swift 4 Compatibility
pod 'AAPickerView', '~> 1.0'
end
Finally, run the following command to install it:
$ pod install
##Carthage
To install Carthage, run (using Homebrew):
$ brew update
$ brew install carthage
Then add the following line to your Cartfile:
github "EngrAhsanAli/AAPickerView" "master"
Then import the library in all files where you use it:
import AAPickerView##Manual Installation
If you prefer not to use either of the above mentioned dependency managers, you can integrate AAPickerView into your project manually by adding the files contained in the Classes folder to your project.
#Getting Started
##Create instance of AAPickerView
You just need to assign AAPickerView class to your UITextField and make the outlet:
@IBOutlet weak var picker: AAPickerView!Now your UITextField is transformed as a picker view as AAPickerView.
##Define picker type
Define type of picker you want to use in your text field. There are two types of pickers available in AAPickerView that are:
StringPickerforUIPickerViewDatePickerforUIDatePicker
Assign one of them as follow:
picker1.pickerType = .string(data: #String collection#)
picker2.pickerType = .date
##Customise the toolbar
You can change UIToolbar colours like:
picker.toolbar.barTintColor = .darkGray
picker.toolbar.tintColor = .black
##Customise StringPicker Label
You can get and customise the StringPicker label as UILabel:
let label = picker.pickerRow
label.font = UIFont(name: "American Typewriter", size: 30)
##Customise UIDatePicker & DateFormatter
You can get your UIDatePicker and DateFormatter which is using behind your UITextField as:
let datePicker = picker.datePicker
datePicker?.datePickerMode = .date

let dateFormatter = picker.dateFormatter
dateFormatter.dateFormat = "dd/MM/YYYY"
##Listen changes thorough callbacks
You can listen the changes of data simply by using the following callback methods:
- StringPicker:
picker.valueDidSelected = { (index) in
    print("selectedString ", stringData[index as! Int])
}- DatePicker
picker.valueDidSelected = { date in
    print("selectedDate ", date as! Date )
}
#Contributions & License
AAPickerView is available under the MIT license. See the LICENSE file for more info.
Pull requests are welcome! The best contributions will consist of substitutions or configurations for classes/methods known to block the main thread during a typical app lifecycle.
I would love to know if you are using AAPickerView in your app, send an email to Engr. Ahsan Ali