Overview
If you have any questions regarding bugs and feature requests, visit the ZEGOCLOUD community .
Live Audio Room Kit is a prebuilt component that helps you to build full-featured live audio rooms into your apps easier.
And it includes the business logic along with the UI, enabling you to customize your live audio apps faster with more flexibility.
When do you need the Live Audio Room Kit
-
When you want to build live audio rooms easier and faster, it allows you:
Build or prototype live audio apps ASAP
Finish the integration in the shortest possible time
-
When you want to customize UI and features as needed, it allows you:
Customize features based on actual business needs
Spend less time wasted developing basic features
Add or remove features accordingly
To build a live audio app from scratch, you may check our Voice Call.
Embedded features
- Ready-to-use Live Audio Room
- Remove speakers
- Speaker seats changing
- Customizable seat layout
- Extendable menu bar
- Device management
- Customizable UI style
- Real-time interactive text chat
Quick start
Prerequisites
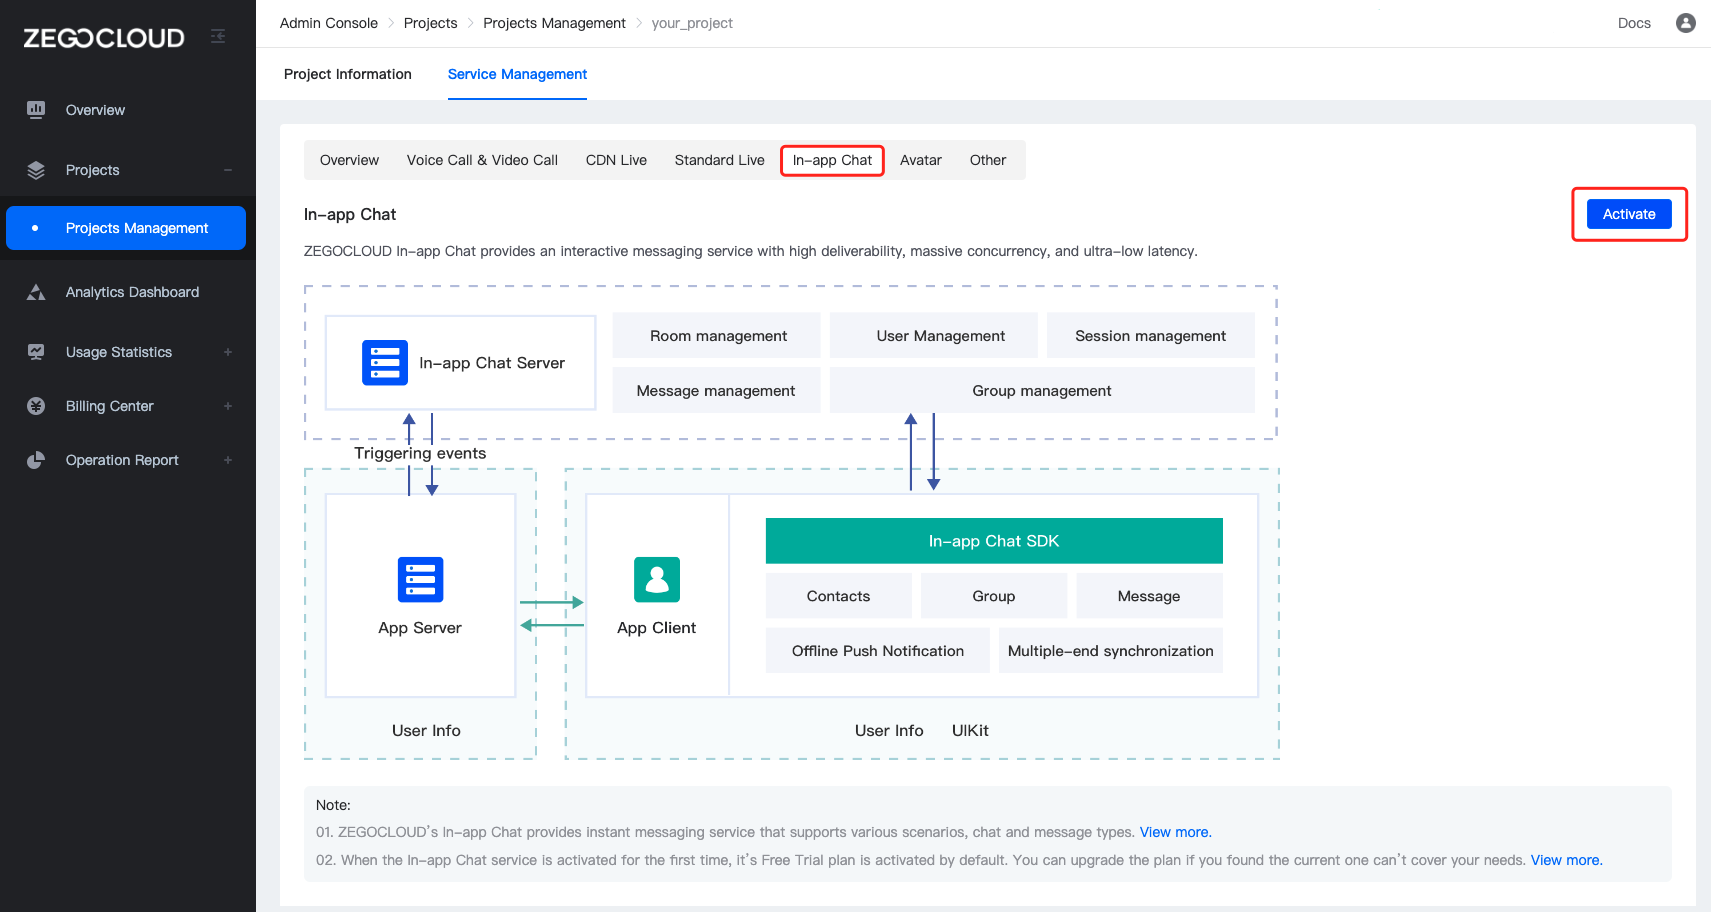
- Go to ZEGOCLOUD Admin Console, and do the following:
- Create a project, get the AppID and AppSign.
- Activate the In-app Chat service (as shown in the following figure).
Integrate the SDK
Add dependencies
Do the following to add the ZegoUIKitPrebuiltLiveAudioRoom dependency:
-
Open Terminal, navigate to your project's root directory, and run the following to create a
podfile:pod init -
Edit the
Podfilefile to add the basic dependency:pod 'ZegoUIKitPrebuiltLiveAudioRoom' -
In Terminal, run the following to download all required dependencies and SDK with Cocoapods:
pod install
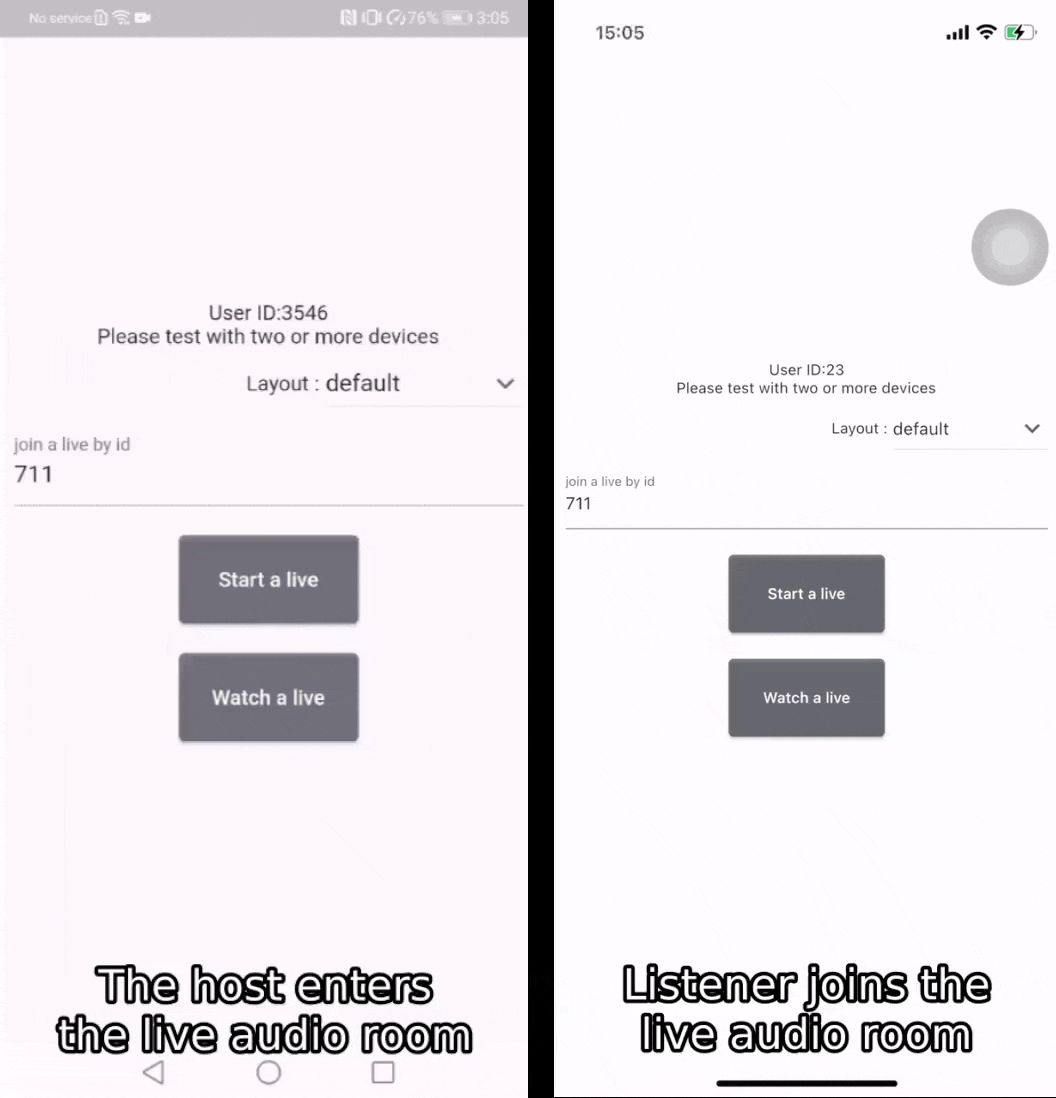
Using the Live Audio Room Kit
-
Specify the
userIDanduserNamefor connecting the Live Audio Room Kit service. -
Create a
roomIDthat represents the live audio room you want to create. -
userIDandroomIDcan only contain numbers, letters, and underlines (_). -
Using the same
roomIDwill enter the same live audio room.
With the same roomID, only one user can enter the live audio room as host. Other users need to enter the live audio room as the audience.
class ViewController: UIViewController {
    let appID: UInt32 = <#AppID#>
    let appSign: String = <#AppSign#>
    var userID: String = <#UserID#>
    var userName: String = <#UserName#>
    var roomID: String = <#RoomID#>

    @IBAction func startLiveAudio(_ sender: Any) {

        let config: ZegoUIKitPrebuiltLiveAudioRoomConfig = ZegoUIKitPrebuiltLiveAudioRoomConfig.host()
        let liveAudioVC: ZegoUIKitPrebuiltLiveAudioRoomVC = ZegoUIKitPrebuiltLiveAudioRoomVC(appID, appSign: appSign, userID: userID, userName: userName, roomID: roomID, config: config)
        liveAudioVC.modalPresentationStyle = .fullScreen
        self.present(liveAudioVC, animated: true, completion: nil)
    }

    @IBAction func joinLiveAudio(_ sender: Any) {
        let config: ZegoUIKitPrebuiltLiveAudioRoomConfig = ZegoUIKitPrebuiltLiveAudioRoomConfig.audience()
        let liveAudioVC: ZegoUIKitPrebuiltLiveAudioRoomVC = ZegoUIKitPrebuiltLiveAudioRoomVC(appID, appSign: appSign, userID: userID, userName: userName, roomID: roomID, config: config)
        liveAudioVC.modalPresentationStyle = .fullScreen
        self.present(liveAudioVC, animated: true)
    }
}
Then, you can create a live audio room by presenting the VC.
Configure your project
1.Open the Info.plist, add the following code inside the dict part:
<key>NSCameraUsageDescription</key>
<string>Access permission to camera is required.</string>
<key>NSMicrophoneUsageDescription</key>
<string>Access permission to microphone is required.</string>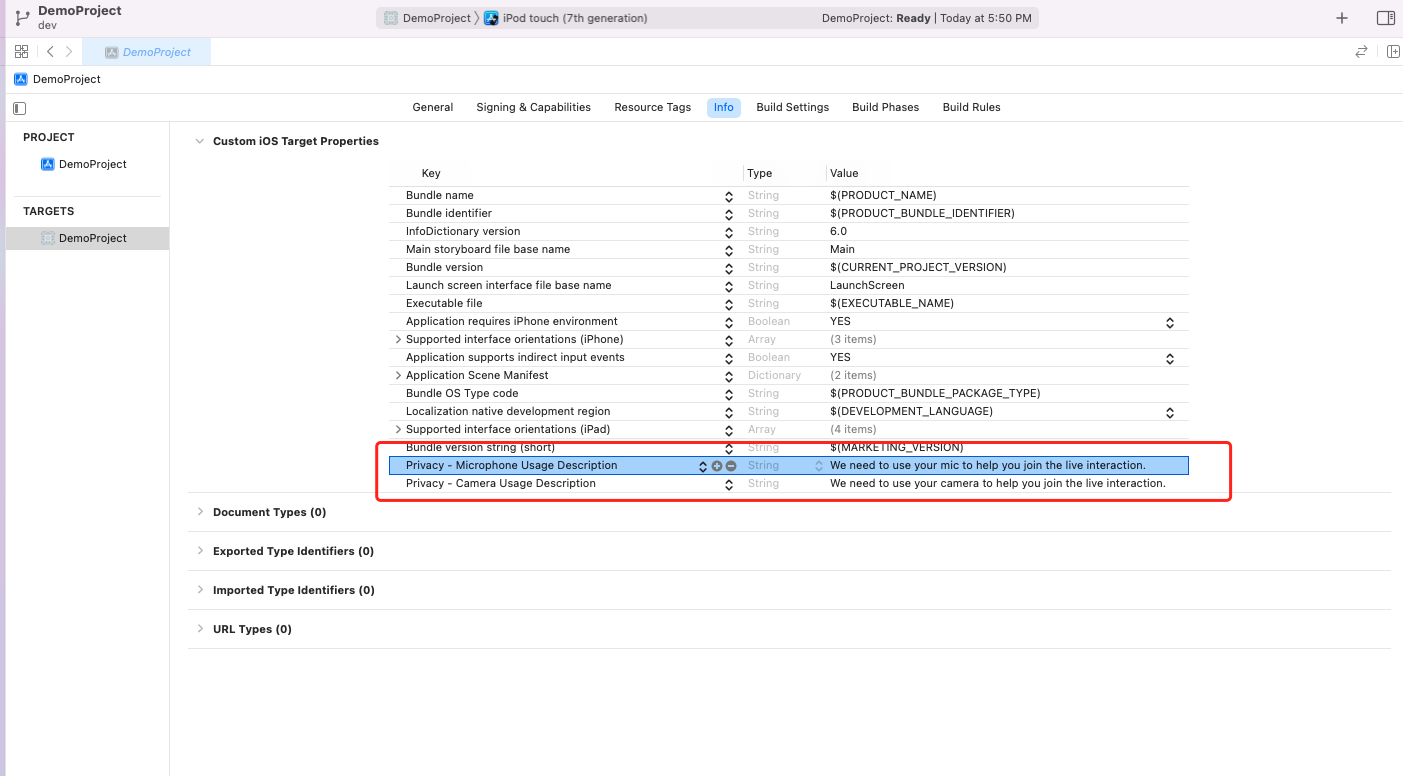
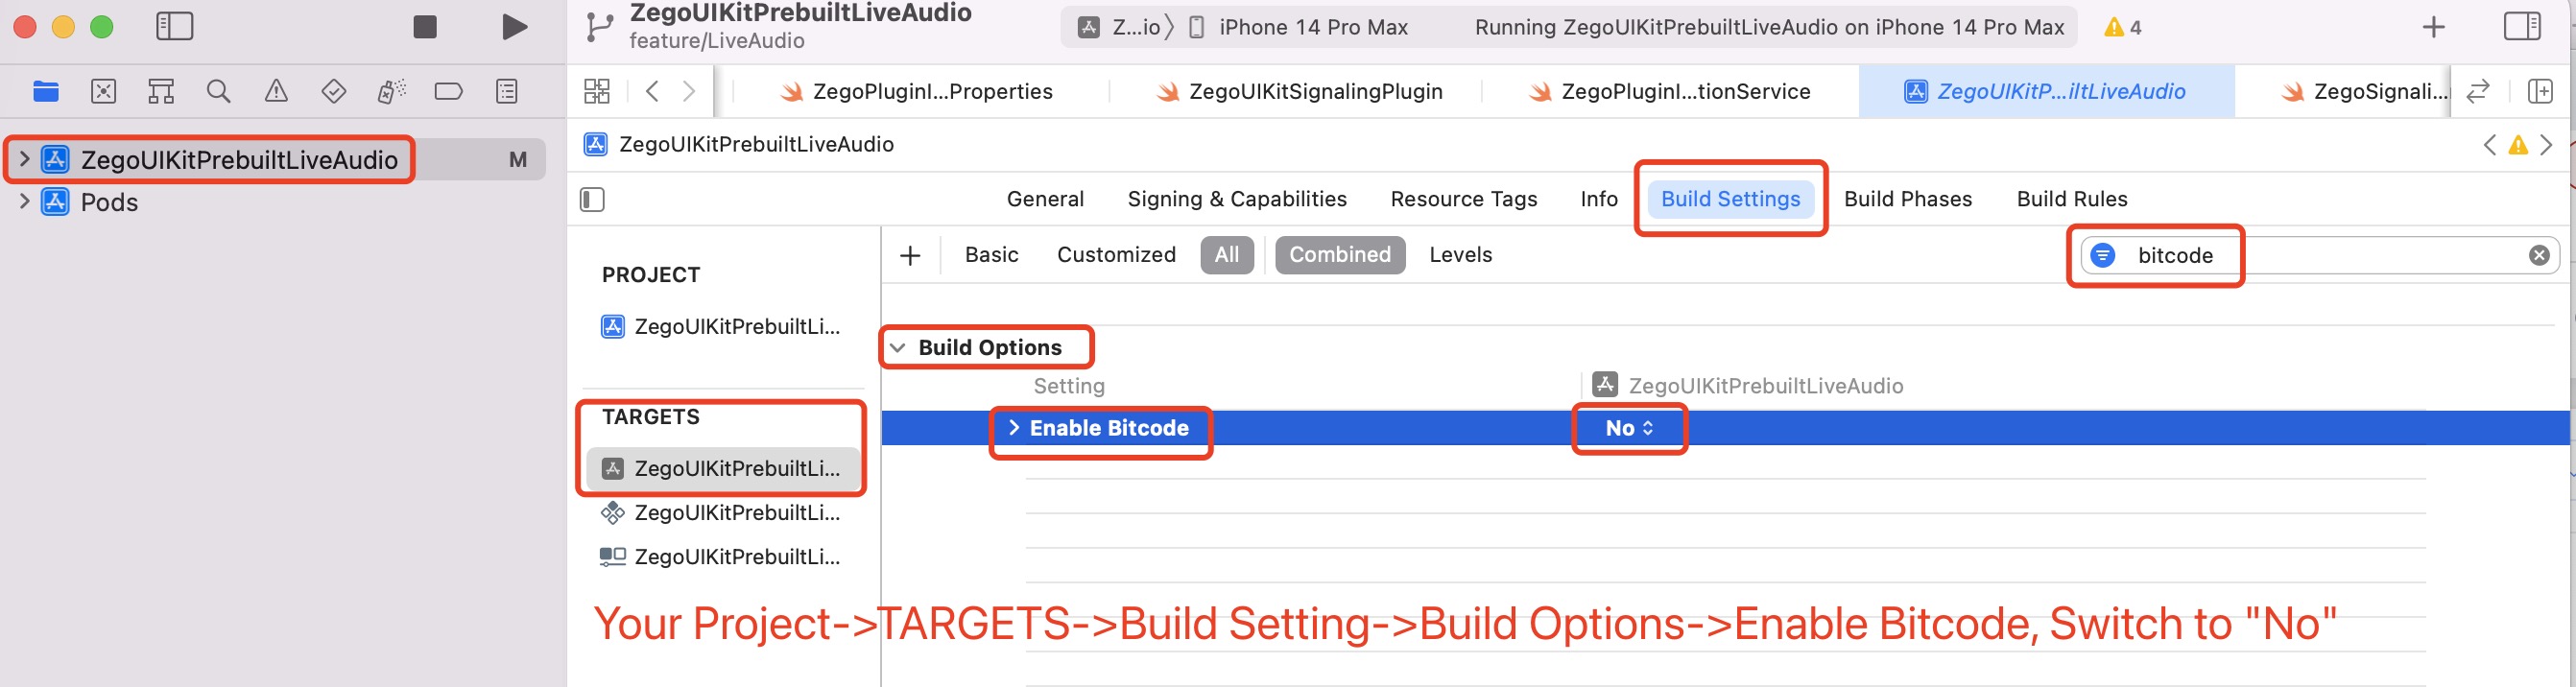
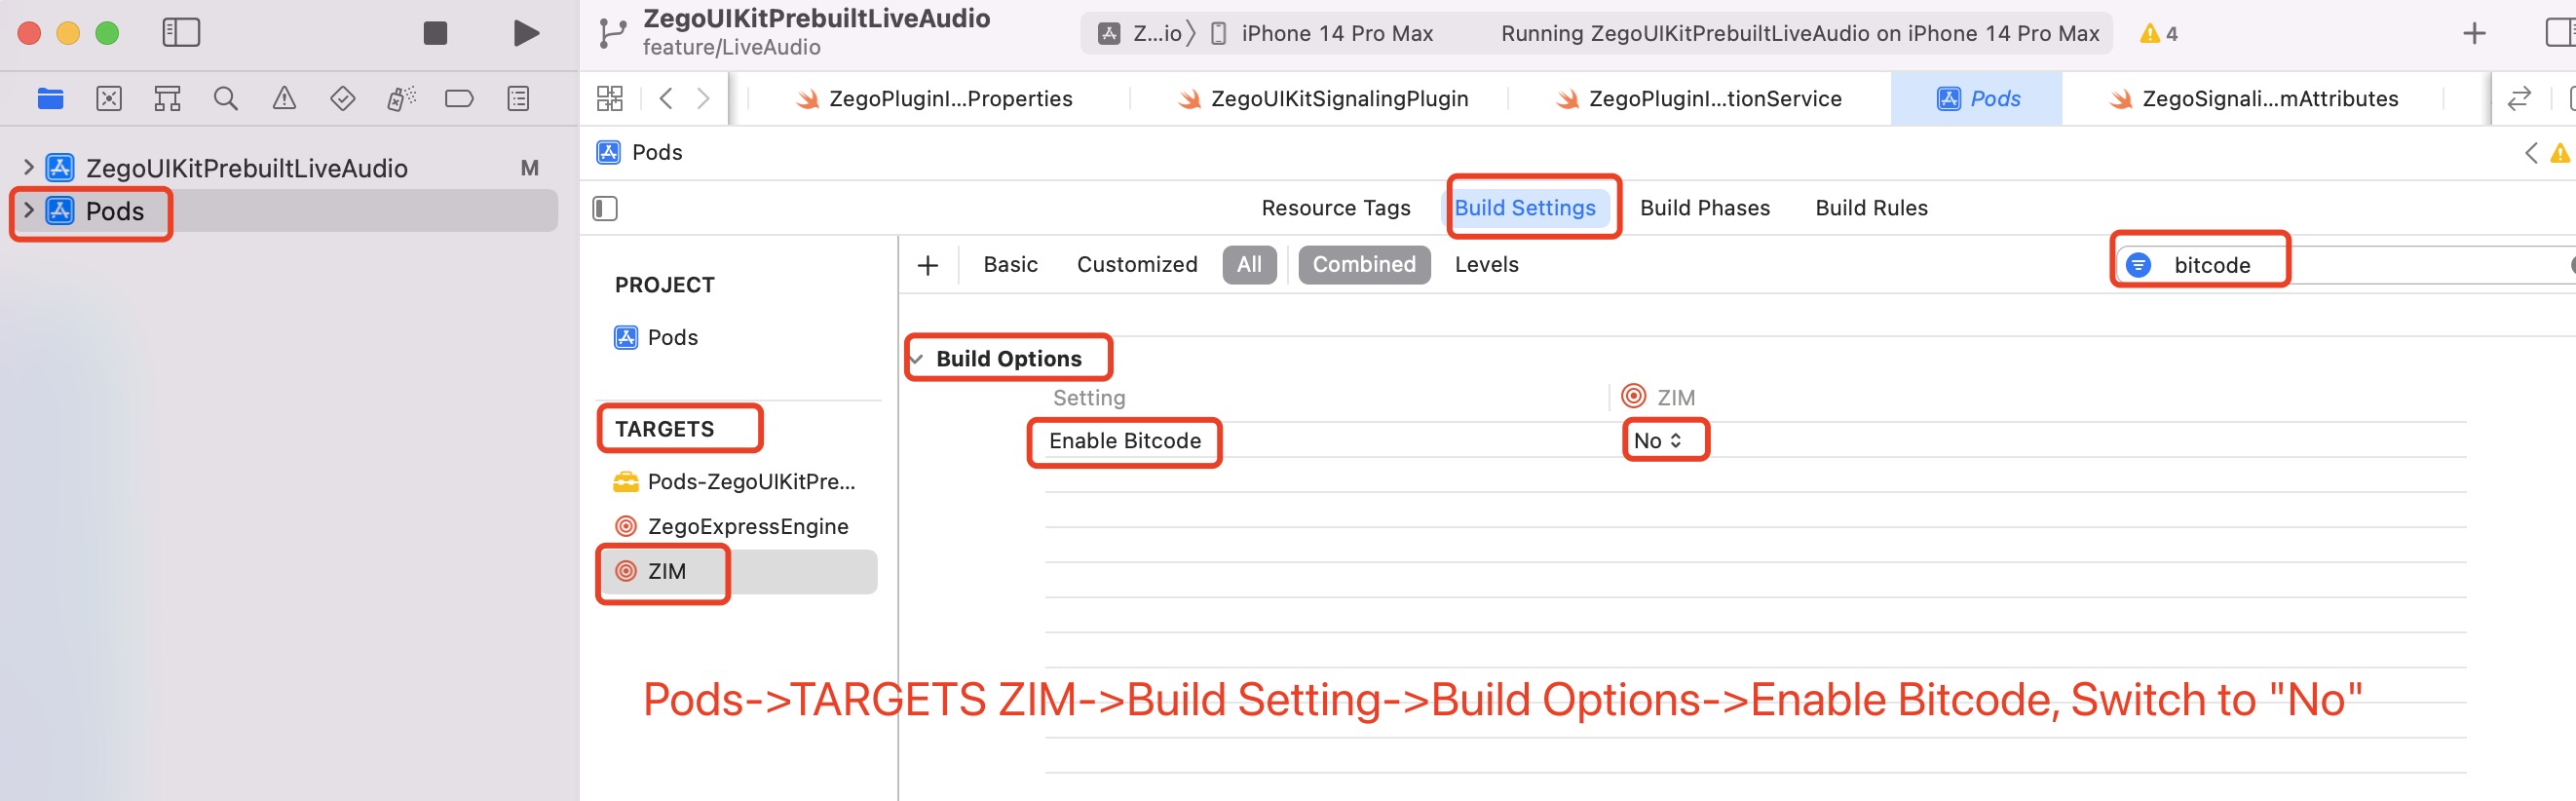
2.Disable the Bitcode. Select your target project, and follow the notes on the following two images to disable the Bitcode respectively.
Run & Test
Now you have finished all the steps!
You can simply click the Run in XCode to run and test your App on your device.
Related guide
Resources
Click to get the complete sample code