YapImageManager 1.0.8
| TestsTested | ✗ |
| LangLanguage | SwiftSwift |
| License | BSD |
| ReleasedLast Release | Sep 2017 |
| SwiftSwift Version | 3.1 |
| SPMSupports SPM | ✗ |
Maintained by Emory Al-Imam, Trevor Stout.
| Depends on: | |
| Alamofire | ~> 4.4 |
| CocoaLumberjack/Swift | ~> 3.1 |
| YapDatabase | ~> 3.0 |
YapImageManager 1.0.8
- By
- Yap Studios
Features
- [x] Asynchronous image downloader with priority queuing
- [x] Advanced memory and database caching using YapDatabase (SQLite)
- [x] Guarantee of only one image download per request
- [x] Cancellation of pending requests with ticket
- [x] Background image decoding, resizing and filtering
- [x] Custom image filters
- [x] Image rendering of gradients and more using filters
- [x] High performance scrolling
- [x] Automatic pause and resume of download queue on reachability changes
- [x] Written completely in Swift
Roadmap Features
- [x] Ability to capture image height and width from the raw decoded image data stream, before the image is downloaded via a notification, for gif, png, and jpeg formats. This is extrememly useful for displaying full width images with the proper aspect ratio in a table view or collection view, by enabling you to calculate the cell height and update the layout almost immediately while the visible images are downloading.
- [x] Ability to return an image with the first frame of a GIF before the entire GIF is downloaded.
- [x] Ability to convert GIFs to MP4 files for better memory managment and scrolling performance
Requirements
- iOS 10.0+ / tvOS 9.0+
- Xcode 8.0+
- Swift 3.0+
Usage
Requesting a full-sized image
Below is an example of how to request a full-sized, decoded image and set the image response on a UIImageView.
  YapImageManager.sharedInstance.asyncImage(forURLString: URLString) { [weak self] response in
    if let image = response.image {
      self?.imageView.image = image
    }
  }
Requesting an image of a specific maximum size
Below is an example of how to fetch a decoded image of a specific size and set the image response on a UIImageView. Requesting an image size that matches the bounds of your UIImageView can increase scrolling performance but avoiding a resize on the GPU. Decoded and sized images are cached in memory, reducing CPU time.
  YapImageManager.sharedInstance.asyncImage(forURLString: URLString, size: self.bounds.size) { [weak self] response in
    if let image = response.image {
      self?.imageView.image = image
    }
  }
Requesting an image with a ticket for cancellation
Requesting an image with a ticket is important for use in a UITableView or UICollectionView with recycling cells. When a cell is recycled, cancelling the ticket ensures that a prior image request will not complete and update the image of a new cell with a different image request. It also will improve performance by cancelling any unneeded download requests for cells that are no longer visible during fast scrolling. Below is an example.
Add the ticket member variable to your class...
private var ticket: ImageRequestTicket?
Request the image, saving the ticket...
  ticket = YapImageManager.sharedInstance.asyncImage(forURLString: URLString, size: self.bounds.size) { [weak self] response in

    if response.ticket == self?.ticket {
      self?.ticket = nil

      if let image = response.image {
        self?.imageView.image = image
      }
    }
  }
In prepareForReuse, cancel the ticket...
  override func prepareForReuse() {
    super.prepareForReuse()

    if let ticket = self.ticket {
      YapImageManager.sharedInstance.cancelImageRequest(forTicket: ticket)
      self.ticket = nil
    }
  }
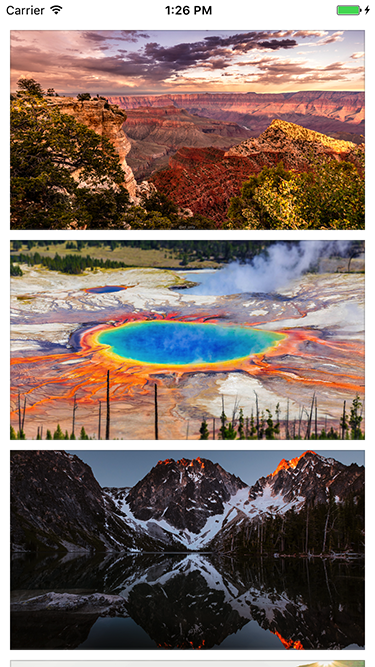
Below is the example output.
Requesting an image with filters
To render an image with one or more image filters, simply pass an array of YapImageFilter in the request. YapImageManager has the following built-in filters:
-
YapAspectFillFilter- draws the original image with content mode aspect fill -
YapGradientFilter- draws a gradient from a specifiedstartColortoendColor -
YapColorFilter- draws a background color, or overlay color, depending on whether you include before or afterYapAspectFillFilter -
YapOverlayImageFilter- draws a customUIImagespecified byoverlayImage
You can create your own custom filters by adopting the protocol YapImageFilter.
Below is an example of adding a gradient overlay to an image. When using filters, be sure at least one filter renders the original image, for example using YapAspectFillFilter.
  let filters: [YapImageFilter] = [YapAspectFillFilter(), YapGradientFilter(startColor: UIColor.black.withAlphaComponent(0.5), endColor: .clear)]
  YapImageManager.sharedInstance.asyncImage(forURLString: URLString, size: self.bounds.size, filters: filters) { [weak self] response in
    if let image = response.image {
      self?.imageView.image = image
    }
  }
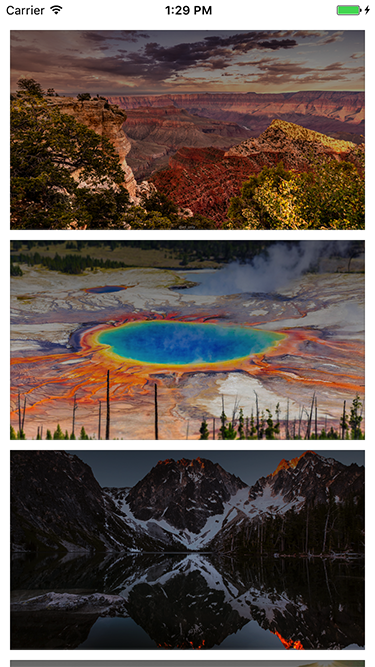
Below is the example output.
To render a new image, for example a gradient
To render a new image using filters, use the createImage method passing in the desired size and an array of YapImageFilter. The following example generates a simple overlay gradient.
  let red = UIColor(red: 0.93, green:0.09, blue:0.31, alpha:1.0)
  let gradient = YapGradientFilter(startColor: red, endColor: .clear)
  YapImageManager.sharedInstance.createImage(withSize: self.bounds.size, filters: [gradient]) { [weak self] image in
    self?.imageView.image = image
  }
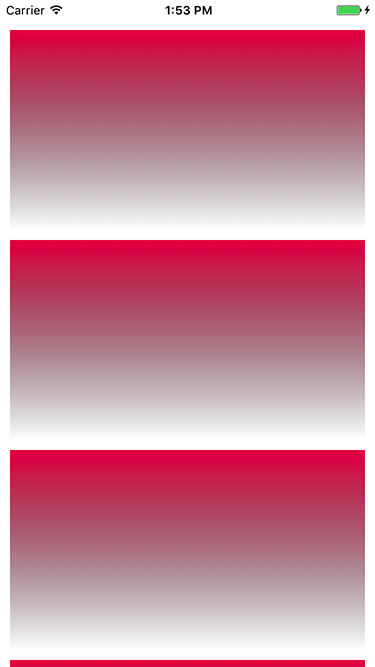
Below is the example output.
Credits
YapImageManager is owned and maintained by Yap Studios.