Barcode and QR Code scanner framework for iOS. VisionSDK provides a way to detect barcodes and qr codes with both manual and auto capturing modes. It also provides OCR for text detection in offline(without internet) and online(label scanning with Restful API) modes. Written in Swift.
- iOS 15.0+
- Swift: 5.7
- Xcode Version: 13.0
CocoaPods is a dependency manager for Cocoa projects. For usage and installation instructions,
visit their website. To integrate VisionSDK into your Xcode project using CocoaPods, specify it in your Podfile:
pod 'VisionSDK'The Swift Package Manager is a tool for automating the distribution of Swift code
and is integrated into the swift compiler.
Once you have your Swift package set up, adding VisionSDK as a dependency is as easy as adding it to the dependencies
value of your Package.swift.
dependencies: [
    .package(url: "https://github.com/packagexlabs/vision-sdk.git", .upToNextMajor(from: "1.0.0"))
]- In Xcode, move to "General > Build Phase > Linked Frameworks and Libraries"
- Add the VisionSDK.xcframework from to your project
- Make sure to mark it "Embed and Sign"
- Write Import statement on your source file
import VisionSDK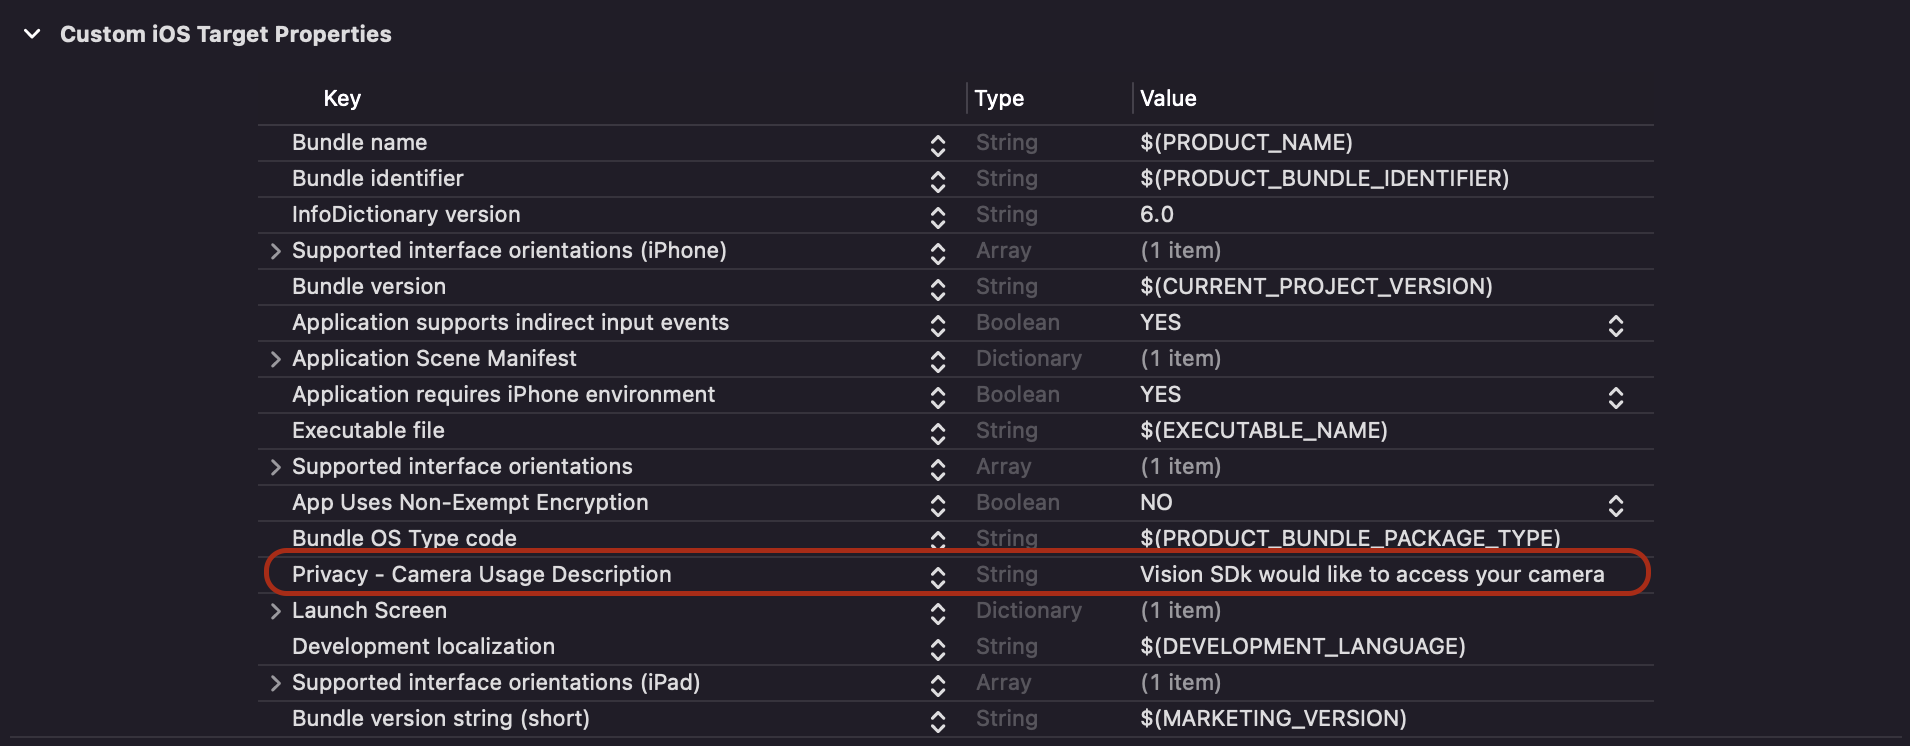
In order to use the OCR API, you have to set Constants.apiKey to your API key. Also, you also need to specify the API environment that you have the API key for. Please note that these have to be set before using the API call. You can generate your own API key at cloud.packagex.io. You can find the instruction guide here.
Constants.apiKey = "your_api_key"
Constants.apiEnvironment = .stagingimport VisionSDK
import AVFoundation
final class ViewController: UIViewController {
override func viewDidLoad() {
super.viewDidLoad()
setupScanner()
}
private func setupScanner() {
switch AVCaptureDevice.authorizationStatus(for: .video) {
case .authorized:
setupScannerView()
case .notDetermined:
AVCaptureDevice.requestAccess(for: .video) { [weak self] granted in
if granted {
DispatchQueue.main.async { [weak self] in
self?.setupScannerView()
}
}
}
default:
showAlert()
}
}
private func setupScannerView() {
let scannerView = CodeScannerView(frame: view.bounds)
view.addSubview(scannerView)
// You can modify FocusSettings properties
let focusSettings = CodeScannerView.FocusSettings()
// You can modify focus ObjectDetectionConfiguration properties
let objectDetectionConfiguration = CodeScannerView.ObjectDetectionConfiguration()
// You can modify focus CameraSettings properties
let cameraSettings = CodeScannerView.CameraSettings()
// For price Tag mode you can use this
let priceTagDetectionSettings = CodeScannerView.PriceTagDetectionSettings()
scannerView.priceTagDetectionSettings = priceTagDetectionSettings
scannerView.configure(delegate: self, focusSettings: focusSettings, objectDetectionConfiguration: objectDetectionConfiguration, cameraSettings: cameraSettings, captureMode: .auto, captureType: .single, scanMode: .autoBarCodeOrQRCode)
scannerView.startRunning()
}
private func showAlert() {
DispatchQueue.main.asyncAfter(deadline: .now() + 0.5) { [weak self] in
let alert = UIAlertController(title: "Error", message: "Camera is required to use in this application", preferredStyle: .alert)
alert.addAction(.init(title: "OK", style: .default))
self?.present(alert, animated: true)
}
}
}
extension ViewController: CodeScannerViewDelegate {
func codeScannerView(_ scannerView: CodeScannerView, didFailure error: CodeScannerError) {
print(error)
}
func codeScannerView(_ scannerView: CodeScannerView, didSuccess codes: [String]) {
print(codes)
}
// called when text, barcode, or qr code is detected in camera stream, Depends on configuration of scanner view in ObjectDetectionConfiguration e.g. isTextIndicationOn, isBarCodeOrQRCodeIndicationOn
func codeScannerViewDidDetect(_ text: Bool, barCode: Bool, qrCode: Bool, document: Bool) {
}
// returns captured image with all barcodes detected in it, cropped image only document is detected in the image, and savedImageURL only if CameraSettings.shouldAutoSaveCapturedImage is set to true in scanner view configuration
func codeScannerView(_ scannerView: VisionSDK.CodeScannerView, didCaptureOCRImage image: UIImage, withCroppedImge croppedImage: UIImage?, withbarCodes barcodes: [String], savedImageURL: URL?) {
}
// This function is called only in Price Tag mode and requires boolean return value to display verification success on camera view. Please note that .priceTag mode works only if you are authenticated user. For authentication, use VisionAPIManager.checkPriceTagAuthenticationWithKey method
func codeScannerViewDidCapturePrice(_ price: String, withSKU sKU: String) -> Bool {
}
}override func viewDidLoad() {
super.viewDidLoad()
let scannerView = CodeScannerView(frame: view.bounds)
scannerView.setScanModeTo(.barcode)
scannerView.setCaptureTypeTo(.multiple)
scannerView.setCaptureModeTo(.manual)
}| Setup Custom Class |
|---|

videoDevice: AVCaptureDevice- It is the video device that is being used by the CodeScannerView. Camera zoom, torch or other device based operations must be carried out on this property. It can be accessed usingCodeScannerView.videoDevicesyntax
scannerView.configure(delegate: VisionSDK.CodeScannerViewDelegate, focusSettings: VisionSDK.CodeScannerView.FocusSettings = .default, objectDetectionConfiguration: VisionSDK.CodeScannerView.ObjectDetectionConfiguration = .default, cameraSettings: VisionSDK.CodeScannerView.CameraSettings = .default, captureMode: VisionSDK.CaptureMode = .auto, captureType: VisionSDK.CaptureType = .single, scanMode: VisionSDK.CodeScannerMode = .qrCode)-
delegate- Should be the class that confirms to theCodeScannerViewDelegateprotocol -
FocusSettings- FocusSettings struct defines the focus related properties of scanner view. These properties are:-
focusImage: UIImage?- Image to be displayed in the centre if the view. If not provided, VisionSDK will use the default image. Note that focus rectangle frame is subject to change with respect to different scan modes. -
focusImageRect: CGRect- Custom rect for the focus image. You can provide your preferred rect or use .zero for default. Note that default focus rectangle frame is subject to change with respect to different scan modes. -
shouldDisplayFocusImage: Bool- set true if you need focused region to be drawn. -
shouldScanInFocusImageRect: Bool- set true if you want to detect codes visible in focused region only. This will discard the codes detected to be outside of the focus image. This applies only in barcode, qr and autoBarCodeOrQRCode modes. -
showCodeBoundariesInMultipleScan: Bool- set true if you want to display boundaries around detetcted codes in multiple code scan. Default value is 'true' -
validCodeBoundryBorderColor: UIColor- Color of border drawn around detected valid code. Default value is '.green' -
validCodeBoundryBorderWidth: CGFloat- Width of border drawn around detected valid code. Default value is '1.0' -
validCodeBoundryFillColor: UIColor- Fill color of border drawn around detected valid code. Default value is '.green.withAlphaComponent(0.3)' -
inValidCodeBoundryBorderColor: UIColor- Color of border drawn around detected invalid code. Default value is '.red' -
inValidCodeBoundryBorderWidth: CGFloat- Width of border drawn around detected invalid code. Default value is '1.0' -
inValidCodeBoundryFillColor: UIColor- Fill color of border drawn around detected invalid code. Default value is '.red.withAlphaComponent(0.3)' -
showDocumentBoundries: Bool- Set true if you want to display boundaries around document detected in camera view. -
documentBoundryBorderColor: UIColor- Set the border color of boundaries drawn around detected document in camera stream. -
documentBoundryFillColor: UIColor- Set the fill color of boundaries drawn around detected document in camera stream. -
focusImageTintColor: UIColor- Set the color you want the focus image to be displayed in when no code is detected. -
focusImageHighlightedColor: UIColor- Set the color you want the focus image to be displayed in when code is detected.
-
-
ObjectDetectionConfiguration- ObjectDetectionConfiguration struct defines the object detection properties of scanner view. These properties are:-
isTextIndicationOn: Bool- Set false if you do not want to detect text in live camera feed. If set falsecodeScannerViewDidDetect(_ text: Bool, barCode: Bool, qrCode: Bool, document: Bool)method will sendtextparameter as false. -
isBarCodeOrQRCodeIndicationOn: Bool- Set false if you do not want to detect bar codes or qrcodes in live camera feed. Using this proerty my be helpful in cases if you want to perform manual capture based on code detection. -
isDocumentIndicationOn: Bool- Set false if you do not want to detect document in live camera feed. -
codeDetectionConfidence: Float- You can set the minimum confidence level for codes detected. Those below the given value will be dicarded. Value must be set on the scale of 0 - 1. Default is0.5. -
documentDetectionConfidence: Float- You can set the minimum confidence level for document detection. Those below the given value will be dicarded. Value must be set on the scale of 0 - 1. Default is0.9. -
secondsToWaitBeforeDocumentCapture: Double- Time threshold to wait before capturing a document automatically in OCR mode. VisionSDK only captures the document if it is continuously detected for the n(value of this property) seconds. Default is3.0. -
selectedTemplateId: String?- Set this value using the template id if you want to detect multiple codes using a specific template. To use a specific template, set the captureType to .multiple as well.
-
-
CameraSettings- CameraSettings struct defines the camera related properties of scanner view. These properties are:-
sessionPreset: Session.Preset- You can set session preset as per your requirement. Default is.high. -
nthFrameToProcess: Int- This is the nth number of the frame that is processed for detection of text, barcodes, and qrcodes in live camera feed if enabled byisTextIndicationOnorisBarCodeOrQRCodeIndicationOn. Processing every single frame may be costly in terms of CPU usage and battery consumption. Default value is10which means that from camera stream of usual 30 fps, every 10 frame is processed. Its value should be set between 1 - 30. -
shouldAutoSaveCapturedImage: Bool- Set true if you want captured image to be saved and get its URL. Upon truefunc codeScannerView(_ scannerView: VisionSDK.CodeScannerView, didCaptureOCRImage image: UIImage, withCroppedImge croppedImage: UIImage?, withbarCodes barcodes: [String], savedImageURL: URL?)will respond with URL of the saved image as well. To clear stored images, you can useCodeScannerView.removeAllSavedImages()instance method.
-
-
PriceTagDetectionSettings- PriceTagDetectionSettings struct defines the price tag related properties of scanner view. These properties are:-
shouldDisplayOnScreenIndicators: Bool- Set true if you want to display price tag verification indicators on screen after detection. -
validTagImage: UIImage- Set the image you want to be dispayed on camera stream when a price tag has been detected and verified as valid. -
invalidTagImage: UIImage- Set the image you want to be dispayed on camera stream when a price tag has been detected and is invalid.
-
-
captureMode- Defines whether the VisionSDK should capture codes automatically or not. If you want to capture code on user action, then set it to.manual. Default value is.auto. If otherwise, you will have to manually trigger scanning usingcapturePhoto()method. -
captureType- Set it to.multipleif you want to allow multiple results from scan. In.manualcase, you will have to manually trigger scanning usingcapturePhoto()method. -
scanMode- Defines the scan mode. It has following options.barCode- Detects barcodes only in this mode.qrCode- Detects qr codes only in this mode.autoBarCodeOrQRCode- Detects both bar codes and qr codes.ocr- Use this mode to capture photos for later user in OCR API call..photo- Use this mode to capture regular photos without the need for OCR.priceTag- Use this mode for scanning price tags. This mode is only available for authenticated users.
scannerView.setScanModeTo(_ mode: VisionSDK.CodeScannerMode)Sets the scan mode to desired mode.
scannerView.setCaptureModeTo(_ mode: VisionSDK.CaptureMode)Sets the capture mode to desired mode.
scannerView.setCaptureTypeTo(_ type: VisionSDK.CaptureType)Sets the capture type to desired type.
scannerView.startRunning()Needs configure() method to be called before it. It starts the camera session and scanning.
scannerView.stopRunning()Stops camera session and scanning.
scannerView.rescan()Use this function to resume scanning
scannerView.deConfigure()Removes all the configurations of scannerView and stops scanning.
scannerView.capturePhoto()Use this method to trigger code scan or photo capture when you are scanning for multiple codes, in manual capture, OCR, or Photo mode.
scannerView.saveImageToVisionSDK(image: UIImage, withName imageName: String) -> URL?Use this method to save an image to VisionSDK internal storage and obtain its URL. Note that VisionSDK saves those images on device storage.
scannerView.removeAllSavedImages()Use this method to delete all images saved internally by VisionSDK. Saving too many images might consume significant storage space, so you can use this method to free up space.
func codeScannerView(_ scannerView: VisionSDK.CodeScannerView, didSuccess codes: [String])This method returns with the codes scanned after successful scan
func codeScannerViewDidDetect(_ text: Bool, barCode: Bool, qrCode: Bool, document: Bool)This method is called when text, barcode or qr code is detected in the camera stream. Values depend on whether text or code indication is enabled while configuring the scanner view.
func codeScannerView(_ scannerView: VisionSDK.CodeScannerView, didCaptureOCRImage image: UIImage, withCroppedImge croppedImage: UIImage?, withbarCodes barcodes: [String], savedImageURL: URL?)This method is called when capturePhoto() method is called in OCR or Photo Mode. It return with the captured image from camera stream, all the
detected codes in it, and an optional cropped document image if a document is detected with in the captured image. savedImageURL parameter provides with the on device image url if CameraSettings.shouldAutoSaveCapturedImage is set to true while configuring the scanner view.
func codeScannerView(_ scannerView: VisionSDK.CodeScannerView, didFailure error: VisionSDK.CodeScannerError)This method is called when an error occurs in any stage of initializing or capturing the codes when there is none detected.
In order to use custom templates for code scanning. It is necessary to create a template first. You can create templates using the following code
    func openTemplateController() {

        let scanController = GenerateTemplateController.instantiate()
        scanController.delegate = self

        if let sheet = scanController.sheetPresentationController {
            sheet.prefersGrabberVisible = true
        }

        self.present(scanController, animated: true)
    }
Listen to the GenerateTemplateControllerDelegate methods to get response.
    extension BarcodeViewController: GenerateTemplateControllerDelegate {

        // This function provides you with the ID of the template that has been created
        func templateScanController(_ controller: GenerateTemplateController, didFinishWith result: String) {
            print(result)
        }

        func templateScanController(_ controller: GenerateTemplateController, didFailWithError error: any Error) {
            controller.dismiss(animated: true)
        }

        func templateScanControllerDidCancel(_ controller: GenerateTemplateController) {
            print("Template creation cancelled")
        }
    }
NOTE: VisionSDK automatically saves created templates into its secure storage. You can access those saved template using methods below
    // This method returns all the ids of the saved templates
    CodeScannerView.getAllTemplates()

    // This method deletes the template with the specified ID
    CodeScannerView.deleteTemplateWithId(_ id: String)

    // This method deletes all saved templates
    CodeScannerView.deleteAllTemplates()
This method must be called first before using offline device OCR. Preparation should complete first without any errors. For that, listen to completion block in the params.
    // This method must be provided with `apiKey` or `token`.
    // modelClass: VSDKModelClass - Select required Model Class. Currently supported is .shippingLabel only
    // modelSize: VSDKModelSize - Select the model size for the above selected Model Class. Currently supported sizes are .micro and .large only.

    func prepareOfflineOCR(withApiKey apiKey: String? = nil, andToken token: String? = nil, forModelClass modelClass: VSDKModelClass, withModelSize modelSize: VSDKModelSize = .micro, withProgressTracking progress: ((_ currentProgress: Float, _ totalSize: Float)->())?, withCompletion completion:((_ error: NSError?)->())?)
For extraction of data using Offline OCR use the following method.
func extractDataFromImage(_ image: CIImage, withBarcodes barcodes: [String], _ completion: @escaping ((Data?, NSError?) -> Void))It returns with the OCR Response based on PackageX Platform API Response.
These methods are called on the shared instance of OnDeviceOCRManager. It can be accessed using OnDeviceOCRManager.shared
syntax.
func checkPriceTagAuthenticationWithKey(_ apiKey: String?, _ completion: @escaping ((_ error: NSError?) -> Void))

func callScanAPIWith(_ image: UIImage, andBarcodes barcodes: [String], andApiKey apiKey: String? = nil, andToken token: String? = nil, andLocationId locationId: String? = nil, andOptions options: [String: String], withImageResizing shouldResizeImage: Bool = true, _ completion: @escaping ((_ data: Data?, _ response: URLResponse?, _ error: NSError?)-> Void))

func callManifestAPIWith(_ image: UIImage, andBarcodes barcodes: [String], andApiKey apiKey: String? = nil, withImageResizing shouldResizeImage: Bool = true, _ completion: @escaping ((_ data: Data?, _ response: URLResponse?, _ error: NSError?) -> Void))
These methods are called on the shared instance of VisionAPIManager. It can be accessed using VisionAPIManager.shared
syntax.
To use price tag scanning, you need to authenticate first using checkPriceTagAuthenticationWithKey method. Upon successful completion block calling without error, you can use price tag mode of scanner view.
callScanAPIWith method recieves the captured image and the API Key or AuthToken as parameters. It returns with the OCR Response from
PackageX Platform API Response.
callManifestAPIWith method recieves the captured image and the API Key as parameters.
The VisionSDK Android Integration is a barcode and QR code scanner framework for Android that provides a simple and efficient way to detect barcodes and QR codes in both manual and automatic capturing modes. It also includes OCR (Optical Character Recognition) capabilities for text detection (label scanning with a Restful API) modes.
Some key features of the VisionSDK Android Integration include:
- Support for multiple view types (rectangular, square, fullscreen) for the scanning window
- Customization options for the scanning window size, shape, and border style
- Capture image and OCR API capabilities
Vision SDK is hosted on JitPack.io
First add JitPack to your root project
maven { url "https://jitpack.io" }Then add the following dependency to your project's build.gradle file:
implementation 'com.github.packagexlabs:vision-sdk-android:v1.0'
In order to use the OCR API, you have to set Constants.apiKey to your API key. Also, you also need to specify the API environment that you have the API key for. Please note that these have to be set before using the API call. You can generate your own API key at cloud.packagex.io. You can find the instruction guide here.
Initialise the SDK first:
There are 2 ways for authentication
- Via API key
- Via Token
VisionSDK.getInstance().initialise(
    authentication = //TODO authentication,
    environment = //TODO environment
)VisionSDK.getInstance().initialise(
apiKey = Authentication.BearerToken(/*Yoru token here*/),
environment = Environment.STAGING
)To start scanning for barcodes and QR codes, use the startScanning method and specify the view type:
private fun startScanning() {

    //setting the scanning window configuration
    binding.customScannerView.startScanning(
        viewType = screenState.scanningWindow,
        scanningMode = screenState.scanningMode,
        detectionMode = screenState.detectionMode,
        scannerCallbacks = this
    )
}There are 2 types of scanning windows:
ViewType.WINDOWby default show a square window for QR detection mode and rectangle for BarcodeViewType.FULLSCREENwhole screen
There are 2 types of scanning mode
Automode will auto-detect any Barcode or QR code based on the detection modeManualmode will detect Barcode or QR code upon callingCapture
Detection mode will tell which codes to detect
QrAndBarcodedetects Barcode and QR Codes collectivelyBarcodedetects only barcodeQRdetects only QR codesOCRfor OCR detection. This mode will call OCR api
There is also Scanner Callback that we need to provide while starting scanning. This is an interface, and it will be giving different callbacks based on the detection mode.
onBarcodeDetectedwhenever a Barcode or QR code is detected in Single modelonImageCapturedwhenever image is capture in OCR modeonMultipleBarcodesDetectedwhen multiple barcodes are detected in multiple modeonFailurewhen some exception is thrown or unable to detect any Barcode/QRCode in manual mode
When there is no Barcode or QRCode detected with in a specific time window then SDK will throw an exception. There are custom exceptions
BarCodeNotDetectedwhen no barcode detected in manual modeQRCodeNotDetectedwhen QR code not detected in manual mode
To customize the appearance and behavior of the scanning window, you can use the setScanningWindowConfiguration method and provide a configuration object with your desired settings.
For example:
As ViewType.RECTANGLE and ViewType.SQUARE have a window, you can configure the scanning window according to yours
requirements. There is also option for setting the scanning window radius along with vertical starting point.
//Setting the Barcode and QR code scanning window sizes
binding.customScannerView.setScanningWindowConfiguration(
  Configuration(
      barcodeWindow = ScanWindow(
          width = ((binding.root.width * 0.9).toFloat()),
          height = ((binding.root.width * 0.4).toFloat()),
          radius = 10f,
          verticalStartingPosition = (binding.root.height / 2) - ((binding.root.width * 0.4).toFloat())
      ), qrCodeWindow = ScanWindow(
          width = ((binding.root.width * 0.7).toFloat()),
          height = ((binding.root.width * 0.7).toFloat()),
          radius = 10f,

          //you can set the vertical position of the scanning window
          verticalStartingPosition = (binding.root.height / 2) - ((binding.root.width * 0.5).toFloat())
      )
  )
)Following are some example of initialise the Scanner with the above-mentioned configuration
It will be detecting the Barcode manually with in a rectangular area
binding.customScannerView.startScanning(
    viewType = ViewType.WINDOW,
    scanningMode = ScanningMode.Manual,
    detectionMode = DetectionMode.Barcode,
    this
)
It will be using full screen for QR code detection and will auto capture barcodes
binding.customScannerView.startScanning(
    viewType = ViewType.FULLSCRREN,
    scanningMode = ScanningMode.Auto,
    detectionMode = DetectionMode.QR,
    this
)For the barcode and indicator there are different live data that you can observe
customScannerView.barcodeIndicatorswill post a new value whenever a new barcode or QR code is detected. To distinguish between Barcode and QR Code you can use the format field e.gTWO_DIMENSIONAL_FORMATS.contains(it.format)customScannerView.textIndicatorwill post a new value whenever a text is detected on the screen
As mentioned above that we have a manual mode. For manual mode trigger, you can call customScannerView.capture(),
based on the mode
it will be giving different callbacks
if detection mode is
DetectionMode.Barcodethen it will trigger theonBarcodeDetectedcallback in case of barcode detection or throw an exceptionQRCodeNotDetectedif barcode not detected with in specific time frame.DetectionMode.QRwill return QR code or throw Exception ofBarCodeNotDetectedDetectionMode.OCRwill capture an image along with the current barcode and return inonImageCaptured
Make sure that when calling capture, scan mode should be manual
With the above live data options, the SDK also provide option to Capture Image and call OCR Api.
You can capture an image when mode is OCR. In OCR mode when capture is called, then in the callback,
it will return an image.
customScannerView.captureImage()fun onImageCaptured(bitmap: Bitmap, value: MutableList<Barcode>?) {
//Image along with the barcodes
}In the callback, it will return the image bitmap along with the barcodes list in the current frame.
For the OCR Api call, you need to set the Environment, there are multiple environment,
plus the Api key. You can call makeOCRApiCall for the ocr analysis on a bitmap. Bitmap and barcodes needs to be
provided. If there are no barcodes,
then provide an empty list.
Below is an example:
customScannerView.makeOCRApiCall(
    bitmap = bitmap,
    barcodeList = list,
    onScanResult = object : OCRResult {
        override fun onOCRResponse(ocrResponse: OCRResponse?) {
            //Successful result
        }

        override fun onOCRResponseFailed(throwable: Throwable?) {
            //Some issue occurred
        }
    })
In the callbacks, Success or error will be returned. It returns with the OCR Response from PackageX Platform API Response.
Copyright 2022 PackageX Labs.
Licensed under the MIT License.