![]()
![]()
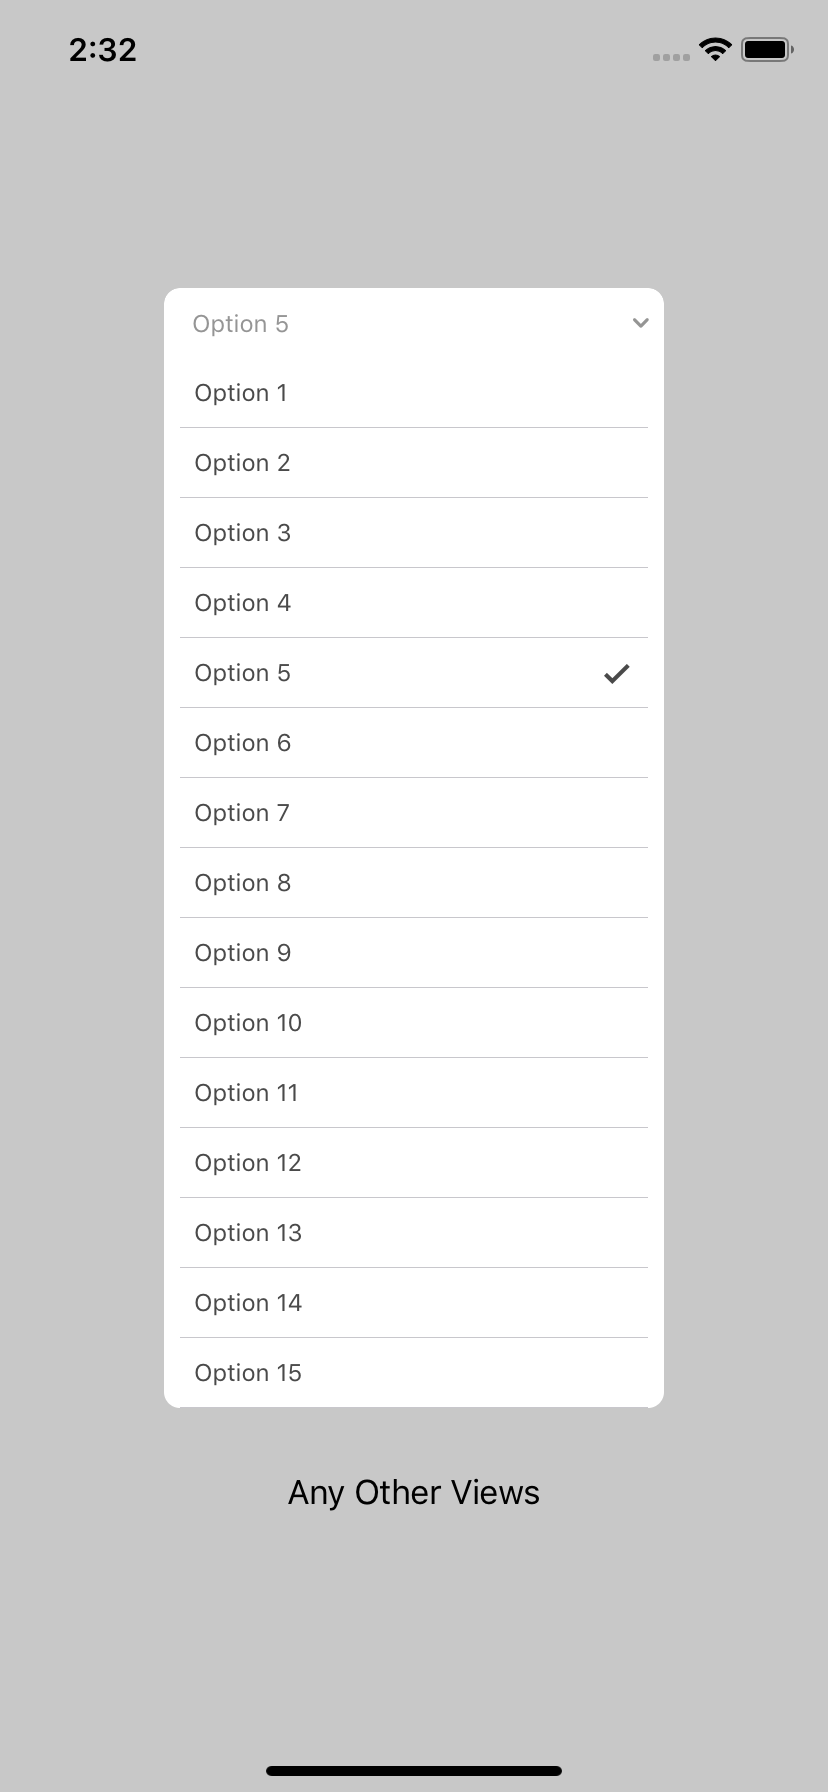
SwiftyMenu is simple yet powerfull drop down menu component for iOS. It allow you to have drop down menu that doesn't appear over your views, which give you awesome user experience.
Screenshots


Requirements
- Xcode 10.2+
- Swift 5+
- iOS 10+
Installation
CocoaPods
CocoaPods is a dependency manager for Cocoa projects. For usage and installation instructions, visit their website. To integrate SwiftyMenu into your Xcode project using CocoaPods, specify it in your Podfile:
pod 'SwiftyMenu', '~> 1.0.1'Swift Package Manager
- Automatically in Xcode:
- Click File > Swift Packages > Add Package Dependency...
- Use the package URL
https://github.com/KarimEbrahemAbdelaziz/SwiftyMenuto add TimelaneCombine to your project.
- Manually in your Package.swift file add:
.package(url: "https://github.com/KarimEbrahemAbdelaziz/SwiftyMenu", from: "1.0.1")Usage
SwiftyMenu supports initialization from Storyboard and Code.
Initialization
Storyboard
Setup your view controller:
// Connect view in storyboard with you outlet
@IBOutlet private weak var dropDownMenu: SwiftyMenu!
Then connect IBOutlet to Storyboard, and connect the Height Constraints of the menu as shown below.

Code
- Init
SwiftyMenu
/// Init SwiftyMenu from Code
let dropDownCode = SwiftyMenu(frame: CGRect(x: 0, y: 0, width: 0, height: 40))- Add
SwiftyMenuasSubview
/// Add it as subview
view.addSubview(dropDownCode)- Setup Constraints
/// Add constraints to SwiftyMenu
/// You must take care of `hegiht` constraint, please.
dropDownCode.translatesAutoresizingMaskIntoConstraints = false

let horizontalConstraint = NSLayoutConstraint(item: dropDownCode, attribute: NSLayoutConstraint.Attribute.centerX, relatedBy: NSLayoutConstraint.Relation.equal, toItem: view, attribute: NSLayoutConstraint.Attribute.centerX, multiplier: 1, constant: 0)

let topConstraint = NSLayoutConstraint(item: dropDownCode, attribute: NSLayoutConstraint.Attribute.top, relatedBy: NSLayoutConstraint.Relation.equal, toItem: otherView, attribute: NSLayoutConstraint.Attribute.top, multiplier: 1, constant: 64)

let widthConstraint = NSLayoutConstraint(item: dropDownCode, attribute: NSLayoutConstraint.Attribute.width, relatedBy: NSLayoutConstraint.Relation.equal, toItem: nil, attribute: NSLayoutConstraint.Attribute.notAnAttribute, multiplier: 1, constant: 255)

dropDownCode.heightConstraint = NSLayoutConstraint(item: dropDownCode, attribute: NSLayoutConstraint.Attribute.height, relatedBy: NSLayoutConstraint.Relation.equal, toItem: nil, attribute: NSLayoutConstraint.Attribute.notAnAttribute, multiplier: 1, constant: 40)

NSLayoutConstraint.activate(
    [
        horizontalConstraint,
        topConstraint,
        widthConstraint,
        dropDownCode.heightConstraint
    ]
)
Configure DataSource
To configure SwiftyMenu DataSource, you'll need to prepare your Model to be able to presented and retrived from the menu. Then, create and assign the DataSource to SwiftyMenu.
Setup Models
We are supporting Generic Data Source, all you have to do is conforming to our Generic Protocol on which type you want to add to the menu.
- Example of
String
extension String: SwiftyMenuDisplayable {
    public var displayableValue: String {
        return self
    }

    public var retrivableValue: Any {
        return self
    }
}- Example of custom
Struct
struct MealSize {
    let id: Int
    let name: String
}

extension MealSize: SwiftyMenuDisplayable {
    public var displayableValue: String {
        return self.name
    }

    public var retrievableValue: Any {
        return self.id
    }
}
Assign DataSource
- Create an
Arrayof your models
/// Define menu data source
/// The data source type must conform to `SwiftyMenuDisplayable`
private let dropDownOptionsDataSource = [
    MealSize(id: 1, name: "Small"),
    MealSize(id: 2, name: "Medium"),
    MealSize(id: 3, name: "Large"),
    MealSize(id: 4, name: "Combo Large")
]- Assign it to
SwiftyMenuDataSource property
dropDownCode.items = dropDownOptionsDataSourceCapture Selection
SwiftyMenu supports 2 ways to capture the selected items, Delegate and Closures. You can use one or both of them at the same time.
Using Delegate
- Conform to
SwiftyMenuDelegate protocol
extension ViewController: SwiftyMenuDelegate {
    // Get selected option from SwiftyMenu
    func swiftyMenu(_ swiftyMenu: SwiftyMenu, didSelectItem item: SwiftyMenuDisplayable, atIndex index: Int) {
        print("Selected item: \(item), at index: \(index)")
    }

    // SwiftyMenu drop down menu will expand
    func swiftyMenu(willExpand swiftyMenu: SwiftyMenu) {
        print("SwiftyMenu willExpand.")
    }

    // SwiftyMenu drop down menu did expand
    func swiftyMenu(didExpand swiftyMenu: SwiftyMenu) {
        print("SwiftyMenu didExpand.")
    }

    // SwiftyMenu drop down menu will collapse
    func swiftyMenu(willCollapse swiftyMenu: SwiftyMenu) {
        print("SwiftyMenu willCollapse.")
    }

    // SwiftyMenu drop down menu did collapse
    func swiftyMenu(didCollapse swiftyMenu: SwiftyMenu) {
        print("SwiftyMenu didCollapse.")
    }
}- Assign
SwiftyMenudelegate
dropDownCode.delegate = selfUsing Closures
You can use callbacks to know what happen:
/// SwiftyMenu also supports `CallBacks`
dropDownCode.didSelectItem = { menu, item, index in
    print("Selected \(item) at index: \(index)")
}

dropDownCode.willExpand = {
    print("SwiftyMenu Will Expand!")
}

dropDownCode.didExpand = {
    print("SwiftyMenu Expanded!")
}

dropDownCode.willCollapse = {
    print("SwiftyMenu Will Collapse!")
}

dropDownCode.didCollapse = {
    print("SwiftyMenu Collapsed!")
}
UI Customization
Having an amazing drop down menu is essential. So, there're a lot of UI customization for SwiftyMenu (More to be added soon).
To configure UI customization for SwiftyMenu:
- Create
SwiftyMenuAttributesproperty
private var codeMenuAttributes = SwiftyMenuAttributes()- Assign it to
SwiftyMenu
/// Configure SwiftyMenu with the attributes
dropDownCode.configure(with: codeMenuAttributes)
Also before assigning it to SwiftyMenu you could customize the menu look using following attributes.
Placeholder
attributes.placeHolderStyle = .value(text: "Please Select Size", textColor: .lightGray)Text Style
attributes.textStyle = .value(color: .gray, separator: " & ", font: .systemFont(ofSize: 12))Scroll
attributes.scroll = .disabledSelection Behavior
attributes.multiSelect = .disabled
attributes.hideOptionsWhenSelect = .enabled
Row Style
attributes.rowStyle = .value(height: 40, backgroundColor: .white, selectedColor: .white)Frame Style
/// Rounded Corners
attributes.roundCorners = .all(radius: 8)

/// Menu Maximum Height
attributes.height = .value(height: 300)

/// Menu Border
attributes.border = .value(color: .gray, width: 0.5)
Arrow Style
/// `SwiftyMenu` have default arrow
attributes.arrowStyle = .value(isEnabled: true)
Separator Style
attributes.separatorStyle = .value(color: .black, isBlured: false, style: .singleLine)Header Style
attributes.headerStyle = .value(backgroundColor: .white, height: 40)Accessory
attributes.accessory = .disabledAnimation
attributes.expandingAnimation = .linear
attributes.expandingTiming = .value(duration: 0.5, delay: 0)

attributes.collapsingAnimation = .linear
attributes.collapsingTiming = .value(duration: 0.5, delay: 0)
Example Project
You could check the full Example project Here.
TODO
- Automate release new version to Cocoapods from Github Actions.
- Add CHANGELOG file for the project.
- Allow custom header and options cells.
- Allow different interactions to dismiss SwiftyMenu.
- Allow to customize the default seperator.
- Support Generic DataSource.
- Support multi selection in SwiftMenu
🔥 . - Support multi SwiftyMenu in one screen.
- Support stack view and add example.
- Support call backs and delegation.
- Support different types of Animations.
- Add different customization to colors for default cells.
And much more ideas to make it solid drop down menu for iOS projects
Android
- ExpandableSelectionView, Thanks to Ahmed Ashraf
❤️ 💪🏻
Author
Karim Ebrahem, [email protected]
License
SwiftyMenu is available under the MIT license. See the LICENSE file for more info.
Credits
You can find me on Twitter @k_ebrahem_.
It will be updated when necessary and fixes will be done as soon as discovered to keep it up to date.
Enjoy!