SpriteKitAutoLayout 0.3.1
| TestsTested | ✗ |
| LangLanguage | Obj-CObjective C |
| License | MIT |
| ReleasedLast Release | Jan 2015 |
Maintained by Maksym Grebenets--dscription=cba-macbook-pro.
SpriteKitAutoLayout 0.3.1
- By
- Maksym Grebenets
- mgrebenets
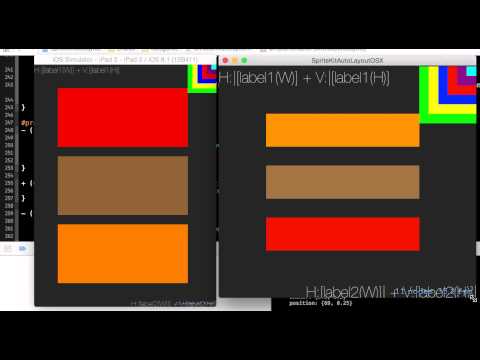
SpriteKitAutoLayout (SKAL) is a framework that brings the power of Auto Layout to your SpriteKit apps.
Good / Bad For
SpriteKitAutoLayout is good for the same purpose Auto Layout is good with UIKit or AppKit, that is to layout your app UI elements, such as buttons, labels, etc. Auto Layout will handle your UI layout when your scene size changes (on rotation for iOS or window resize on OSX).
It is not good for things that don't need any layout as such. For example a sprite that represents one of your (game) characters, which moves around, changes it's scale, rotates, animates and does other crazy things.
Installation
Usage
Start with including the header file.
#import <SpriteKitAutoLayout/SpriteKitAutoLayout.h>Put it in your Bridging Header if your project is Swift project.
That's pretty much it in regards to configuration, now you can use Auto Layout for SpriteKit nodes the same way you do that for UIKit/AppKit views.
The major difference is that you have to set autoLayoutEnabled to true, this is similar to setting translatesAutoresizingMaskIntoConstraints to NO in UIKit/AppKit.
You also have to call layoutNodes method of SKScene excplicitly. The best way to do that is in didChangeSize: implementation. Note, that you have to dispatch it asynchronously on main queue if you want you UI updates to be properly applied.
import SpriteKit

class DemoScene: SKScene {
    override func didMoveToView(view: SKView) {
        super.didMoveToView(view)

        self.scaleMode = .ResizeFill
        self.name = "DemoScene"

        // Add label to put it left bottom corner
        let leftBottomLabel = SKLabelNode()
        leftBottomLabel.text = "Left Bottom"
        leftBottomLabel.name = "leftBottomLabel"    // a C language identifier
        leftBottomLabel.autoLayoutEnabled = true    // enable autolayout for this node
        addChild(leftBottomLabel)

        // Add color sprite with non-default anchor point to put in the center
        let centerSprite = SKSpriteNode(color: SKColor.greenColor(), size: CGSizeZero)
        centerSprite.name = "centerSprite"
        centerSprite.anchorPoint = CGPoint(x: 1, y: 1)  // non-default anchor point
        centerSprite.autoLayoutEnabled = true
        addChild(centerSprite)

        // Get dictionary of all nodes in this scene
        let nodesDic = self.nodesDic()  // self. is required to avoid compile error

        // Configure Auto Layout constraints

        // Pin label to left bottom corner, use label's intrinsic size
        let width = Float(leftBottomLabel.frame.width)
        var format = "H:|[leftBottomLabel(\(width))]"
        var constraints = NSLayoutConstraint.constraintsWithVisualFormat(format, options: .DirectionLeadingToTrailing, metrics: nil, views: nodesDic)
        addConstraints(constraints) // add constraints

        let height = Float(leftBottomLabel.frame.height)
        format = "V:|[leftBottomLabel(\(height))]"
        constraints = NSLayoutConstraint.constraintsWithVisualFormat(format, options: .DirectionLeadingToTrailing, metrics: nil, views: nodesDic)
        addConstraints(constraints) // add constraints

        // Put color sprite in the center
        // Make it's size related to parent (aka "superview")

        // Constraint center (x, y) to parent's (x, y)
        // it's save to do it here because parent is skene filling whole SKView
        var constraint = NSLayoutConstraint(item: centerSprite, attribute: .CenterX, relatedBy: .Equal, toItem: self, attribute: .CenterX, multiplier: 1, constant: 0)
        addConstraint(constraint)
        constraint = NSLayoutConstraint(item: centerSprite, attribute: .CenterY, relatedBy: .Equal, toItem: self, attribute: .CenterY, multiplier: 1, constant: 0)
        addConstraint(constraint)

        // Make the the centerSprite's width to be 20% of the parent's width
        constraint = NSLayoutConstraint(item: centerSprite, attribute: .Width, relatedBy: .Equal, toItem: self, attribute: .Width, multiplier: 0.2, constant: 0)
        addConstraint(constraint)

        // Make the centerSprite's height to be equal to centerSprite's width
        constraint = NSLayoutConstraint(item: centerSprite, attribute: .Height, relatedBy: .Equal, toItem: centerSprite, attribute: .Height, multiplier: 1, constant: 0)
        centerSprite.addConstraint(constraint)  // centerSprite's constraint on itself
    }

    override func didChangeSize(oldSize: CGSize) {
        dispatch_async(dispatch_get_main_queue()) {
            layoutNodes()
        }
    }
}
Use With Other Auto Layout Frameworks
Want to use it with other Auto Layout wrappers and helpers?
No problem, use SKNode's layoutProxyView() read-only property exposed since 0.2.0.
For example, this is what you code would look like with Cartography.
let button = SKSpriteNode(color: SKColor.greenColor(), size: CGSizeZero)
button.autoLayoutEnabled = true
addChild(button)

layout(button.layoutProxyView()) { button in
    // button in closure is not the same as 'let button' declared before
    button.left == button.superview!.left   // same as "H:|[button]"
    button.bottom == button.superview!.bottom   // same as "V:|[button]"
    button.height == button.superview!.height * 0.1
    button.width == button.height
}
Example
To run the example project, clone the repo, and run pod install from the Example directory first.
Requirements
Just like SpriteKit itself SpriteKitAutoLayout is available both for iOS and OSX platforms.
- Min iOS version is 7.0
- Min OSX version is 10.9
Limitations & Issues
- Setting constraints for SKLabelNode is tricky if you want to use
.CenterX,.CenterYor other attributes. - No support for intrinsic size on labels and sprites.
Roadmap
- Support for non-default anchor points for SKScene. Now works fine with (0.5, 0.5) only.
- Support for concept of intrinsic size for SKLabelNode and SKSpriteNode.
- More and more unit tests!
- Make it more lightweight by using dummy subclass of CALayer for UIView instances.
Author
Maksym Grebenets, [email protected]
License
SpriteKitAutoLayout is available under the MIT license. See the LICENSE file for more info.