PasscodeView 0.3.0
| TestsTested | ✗ |
| LangLanguage | Obj-CObjective C |
| License | MIT |
| ReleasedLast Release | Nov 2016 |
Maintained by David Westerhoff.
PasscodeView 0.3.0
- By
- David Westerhoff
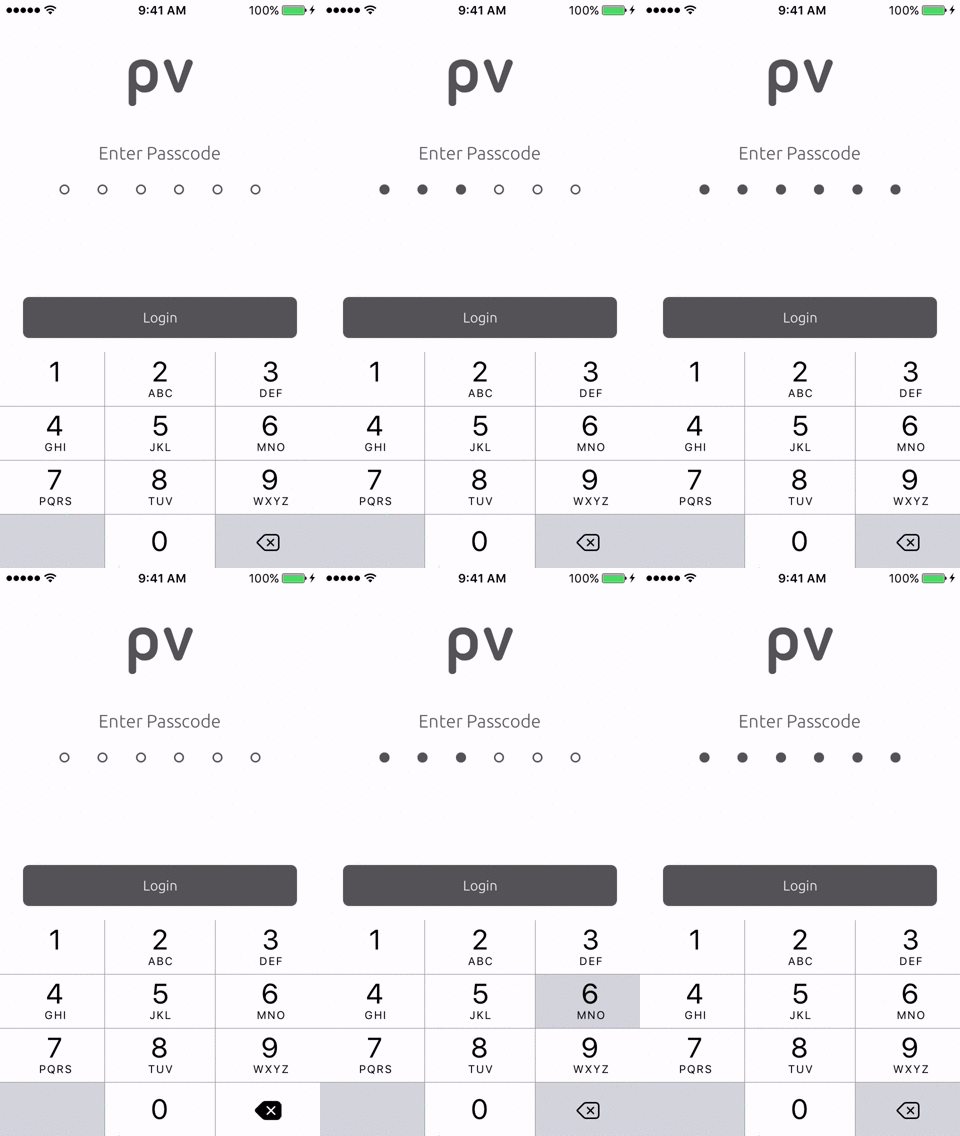
PasscodeView is an input view for secure passcode entry, and is inspired from the iOS 7+ unlock screen. It is easy to use and best of all fully IBDesignable and IBInspectable. That is you can fully configure the look and feel of your custom PasscodeView in seconds right in interface builder.
Table of Contents
Features
- Easy to use drop in replacement for UIView
- Customization options
- IBDesignable and IBInspectable properties
- 100% documentation coverage
Installation
Source
You can clone the repo with git:
git clone https://github.com/pinnrepo/PasscodeView.git
then simply add the files to your project, and use a local import header
#import "PasscodeView.h"Usage
Storyboard
Simply drag a UIView reference onto your storyboard where you would like it
to go. Then set your custom class to PasscodeView and your set. If you would
like you can then configure some of the IBInspectable properties via the
storyboard attributes editor (or do it in code!). Next you will want to
create an IBOutlet for your PasscodeView instance.
# Now you can configure more or just update the update the progress when needed
self.passcodeView.progress = passwordString.length;
Programmatically
Here your just gonna do a frame init, configure, add the subview and your good to go!
PasscodeView *passcodeView = [[PasscodeView alloc] initWithFrame:CGRectMake(100,100,200,200)];
passcodeView.borderWidth = 2.0f;
passcodeView.size = 15.0f;
passcodeView.length = 6;
[self.view addSubview:passcodeView];

# Some time later... update the progress value
passcodeView.progress = passcodeString.length;
Example
Running the example app is easy and helpful to see how PasscodeView works.
- Clone the repository -
git clone https://github.com/pinnrepo/PasscodeView.git - Open the workspace -
open Example/PasscodeView.xcworkspace - Compile and run for simulator or device
Documentation
You can check out the full reference documentation here.
Contributing
Got a great idea and want to contribute? Here's how you can help...
- Fork it
- Create your feature branch:
git checkout -b my-new-feature - Commit your changes:
git commit -am 'Add some feature' - Push to the branch:
git push origin my-new-feature - Submit a pull request
History
For complete release notes check out the changelog
Roadmap
- Comprehensive testing suite
- Additional customization options
License
The MIT License (MIT)
Copyright (c) 2016 Pinn Technologies, Inc.
Permission is hereby granted, free of charge, to any person obtaining a copy of this software and associated documentation files (the "Software"), to deal in the Software without restriction, including without limitation the rights to use, copy, modify, merge, publish, distribute, sublicense, and/or sell copies of the Software, and to permit persons to whom the Software is furnished to do so, subject to the following conditions:
The above copyright notice and this permission notice shall be included in all copies or substantial portions of the Software.
THE SOFTWARE IS PROVIDED "AS IS", WITHOUT WARRANTY OF ANY KIND, EXPRESS OR IMPLIED, INCLUDING BUT NOT LIMITED TO THE WARRANTIES OF MERCHANTABILITY, FITNESS FOR A PARTICULAR PURPOSE AND NONINFRINGEMENT. IN NO EVENT SHALL THE AUTHORS OR COPYRIGHT HOLDERS BE LIABLE FOR ANY CLAIM, DAMAGES OR OTHER LIABILITY, WHETHER IN AN ACTION OF CONTRACT, TORT OR OTHERWISE, ARISING FROM, OUT OF OR IN CONNECTION WITH THE SOFTWARE OR THE USE OR OTHER DEALINGS IN THE SOFTWARE.

