BSText(The Swift Version of YYText)


Powerful text framework for iOS to display and edit rich text (the prefix 'BS' is come from BlueSky, The BlueSky Studio who created films named "Ice Age", Here is The cute squirrel.).
Features
- UILabel and UITextView API compatible
- High performance asynchronous text layout and rendering
- Extended CoreText attributes with more text effects
- Text attachments with UIImage, UIView and CALayer
- Custom highlight text range to allow user interact with
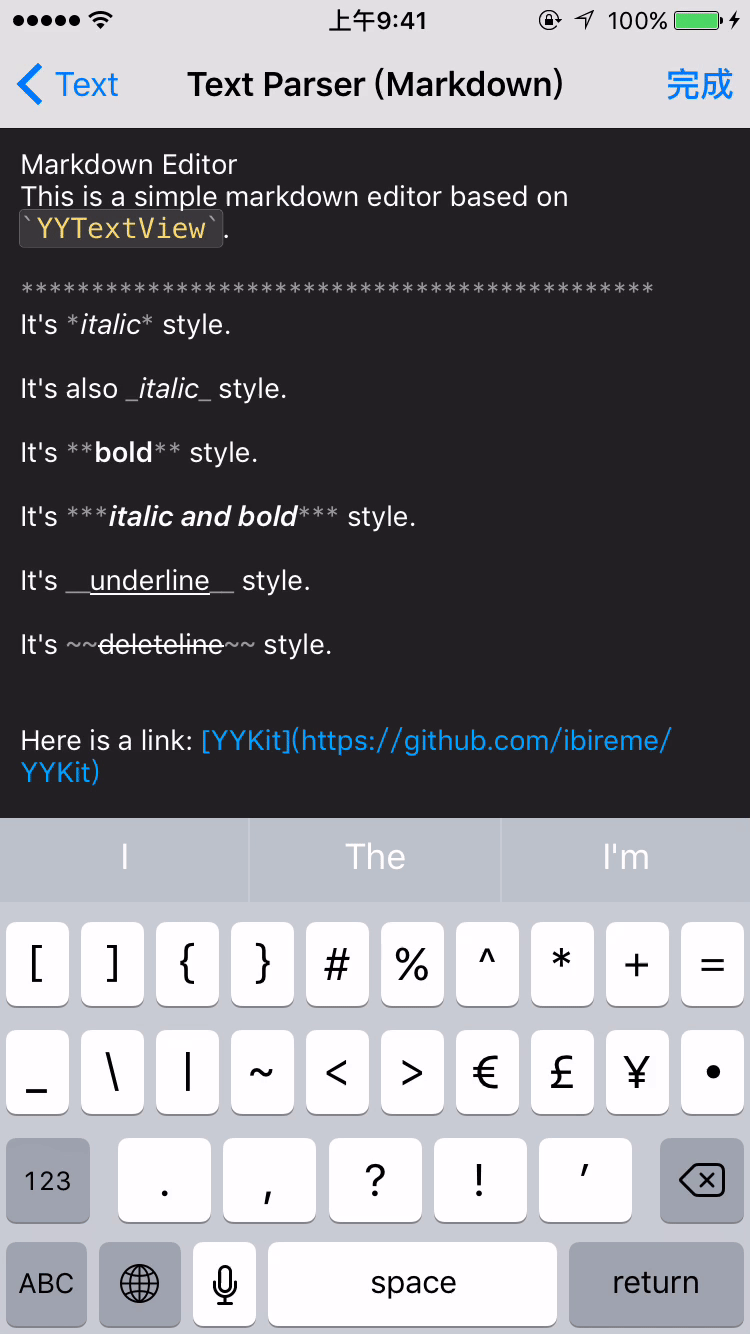
- Text parser support (built in markdown/emoticon parser)
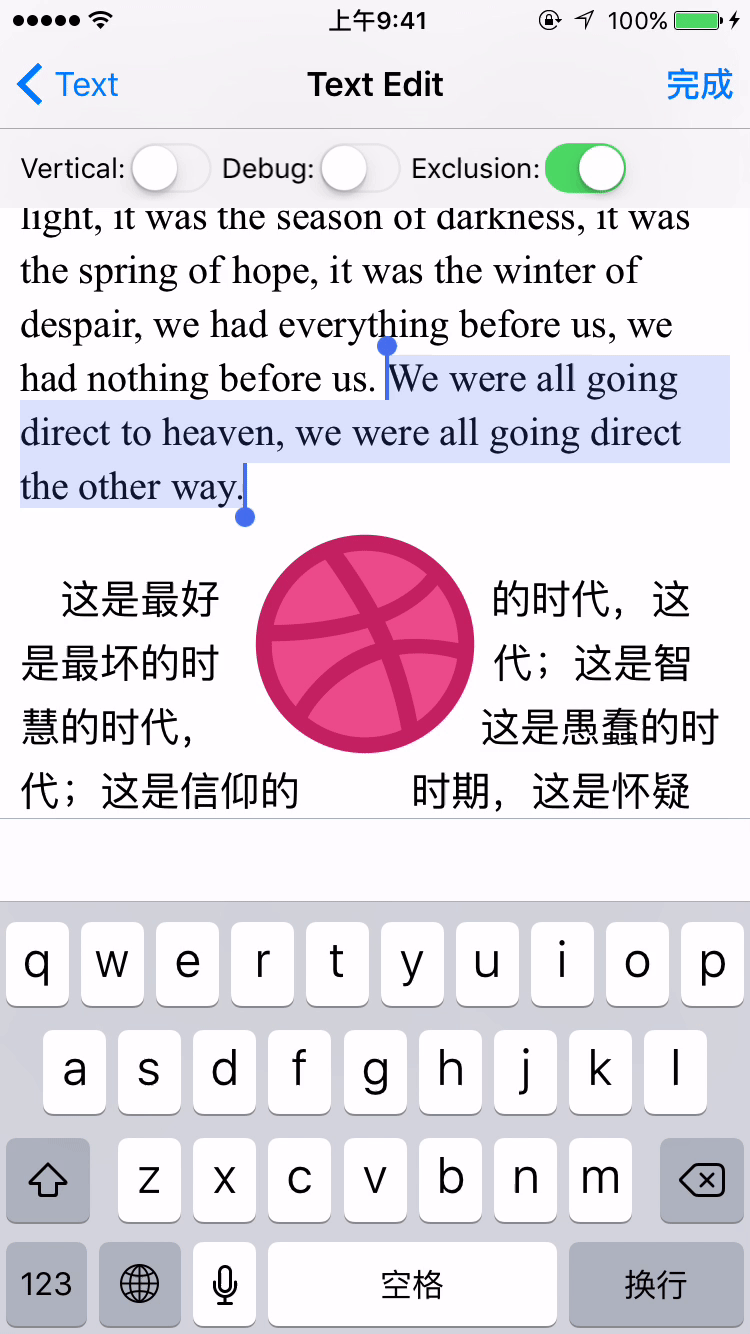
- Text container path and exclusion paths support
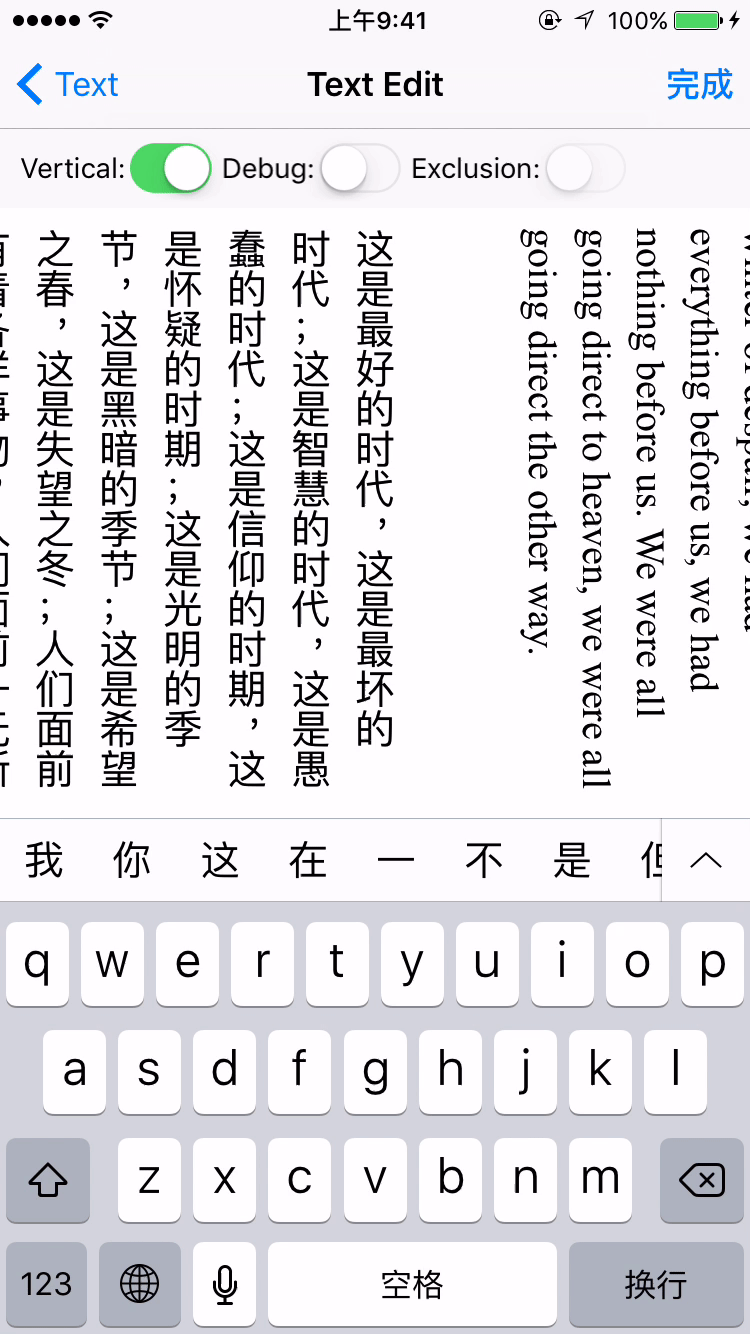
- Vertical form layout support (for CJK text)
- Image and attributed text copy/paste support
- Attributed text placeholder support
- Custom keyboard view support
- Undo and redo control
- Attributed text archiver and unarchiver support
- Multi-language and VoiceOver support
- Fully documented
Architecture
All Same as YYText
Text Attributes
BSText supported attributes
| Demo | Attribute Name | Class |
|---|---|---|
 |
TextAttachment | TextAttachment |
 |
TextHighlight | TextHighlight |
 |
TextBinding | TextBinding |
 |
TextShadow TextInnerShadow |
TextShadow |
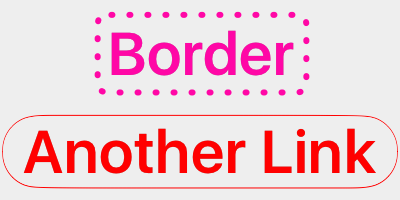 |
TextBorder | TextBorder |
 |
TextBackgroundBorder | TextBorder |
 |
TextBlockBorder | TextBorder |
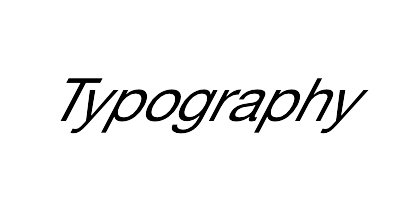 |
TextGlyphTransform | NSValue(CGAffineTransform) |
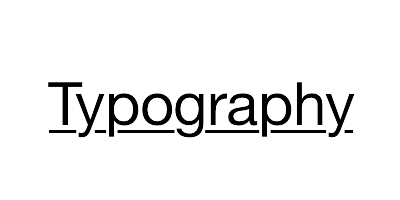 |
TextUnderline | TextDecoration |
 |
TextStrickthrough | TextDecoration |
 |
TextBackedString | TextBackedString |
CoreText attributes which is supported by BSText
| Demo | Attribute Name | Class |
|---|---|---|
 |
Font | UIFont(CTFontRef) |
 |
Kern | NSNumber |
 |
StrokeWidth | NSNumber |
 |
StrokeColor | CGColorRef |
 |
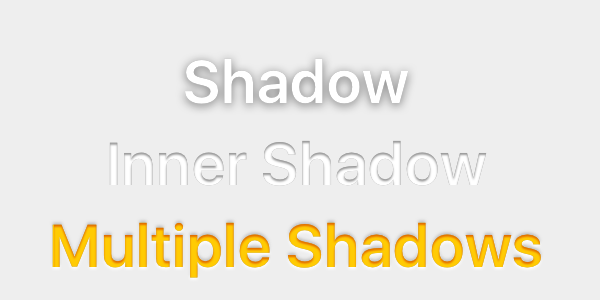
Shadow | NSShadow |
 |
Ligature | NSNumber |
 |
VerticalGlyphForm | NSNumber(BOOL) |
 |
WritingDirection | NSArray(NSNumber) |
 |
RunDelegate | CTRunDelegateRef |
 |
TextAlignment | NSParagraphStyle (NSTextAlignment) |
 |
LineBreakMode | NSParagraphStyle (NSLineBreakMode) |
 |
LineSpacing | NSParagraphStyle (CGFloat) |
 |
ParagraphSpacing ParagraphSpacingBefore |
NSParagraphStyle (CGFloat) |
 |
FirstLineHeadIndent | NSParagraphStyle (CGFloat) |
 |
HeadIndent | NSParagraphStyle (CGFloat) |
 |
TailIndent | NSParagraphStyle (CGFloat) |
 |
MinimumLineHeight | NSParagraphStyle (CGFloat) |
 |
MaximumLineHeight | NSParagraphStyle (CGFloat) |
 |
LineHeightMultiple | NSParagraphStyle (CGFloat) |
 |
BaseWritingDirection | NSParagraphStyle (NSWritingDirection) |
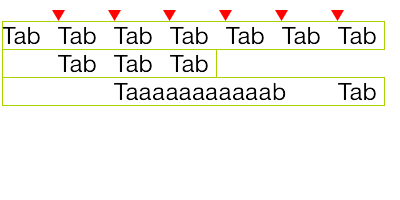 |
DefaultTabInterval TabStops |
NSParagraphStyle CGFloat/NSArray(NSTextTab) |
Usage
Basic
// BSLabel (similar to UILabel)
let label = BSLabel()
label.frame = ...
label.font = ...
label.textColor = ...
label.textAlignment = ...
label.lineBreakMode = ...
label.numberOfLines = ...
label.text = ...

// BSTextView (similar to UITextView)
let textView = BSTextView()
textView.frame = ...
textView.font = ...
textView.textColor = ...
textView.dataDetectorTypes = ...
textView.placeHolderText = ...
textView.placeHolderTextColor = ...
textView.delegate = ...
Attributed text
// 1. Create an attributed string.
let text = NSMutableAttributedString(string: "Some Text, blabla...")
// 2. Set attributes to text, you can use almost all CoreText attributes.
text.bs_font = UIFont.boldSystemFont(ofSize:30)
text.bs_color = UIColor.blue
text.bs_set(color: UIColor.red, range: NSRange(location: 0, length: 4))
text.bs_lineSpacing = 10
// 3. Set to BSLabel or BSTextView.
let label = BSLabel()
label.frame = CGRect(x: 15, y: 100, width: 200, height: 80)
label.attributedText = text
let textView = BSTextView()
textView.frame = CGRect(x: 15, y: 200, width: 200, height: 80)
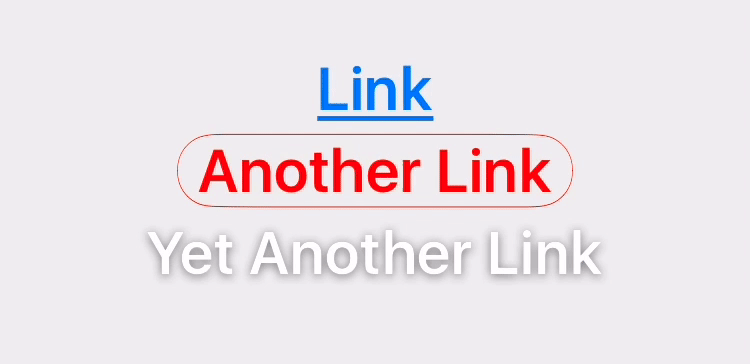
textView.attributedText = textText highlight
You can use some convenience methods to set text highlight:
text.bs_set(textHighlightRange: range,
            color: UIColor.blue,
            backgroundColor: UIColor.gray) { (view, text, range, rect) in
    print("tap text range:...")
}
Or set the text highlight with your custom config:
// 1. Create a 'highlight' attribute for text.
let border = TextBorder.border(with: UIColor.gray, cornerRadius: 3)

let highlight = TextHighlight()
highlight.color = .white
highlight.backgroundBorder = highlightBorder
highlight.tapAction = { (containerView, text, range, rect) in
    print("tap text range:...")
    // you can also set the action handler to BSLabel or BSTextView.
}

// 2. Add 'highlight' attribute to a range of text.
let attributedText = NSMutableAttributedString(string: " ")
attributedText.bs_set(textHighlight: highlight, range: highlightRange)

// 3. Set text to label or text view.
let label = BSLabel()
label.attributedText = attributedText

let textView = BSTextView()
textView.delegate = self
textView.attributedText = ...

// 4. Receive user interactive action.
label.highlightTapAction = { (containerView, text, range, rect) in
    print("tap text range:...")
};
label.highlightLongPressAction = { (containerView, text, range, rect) in
    print("tap text range:...")
};

// MARK: - TextViewDelegate
func textView(_ textView: BSTextView, didTap highlight: TextHighlight, in characterRange: NSRange, rect: CGRect) {
    print("tap text range:...")
}
func textView(_ textView: BSTextView, didLongPress highlight: TextHighlight, in characterRange: NSRange, rect: CGRect) {
    print("tap text range:...")
}
Text attachments
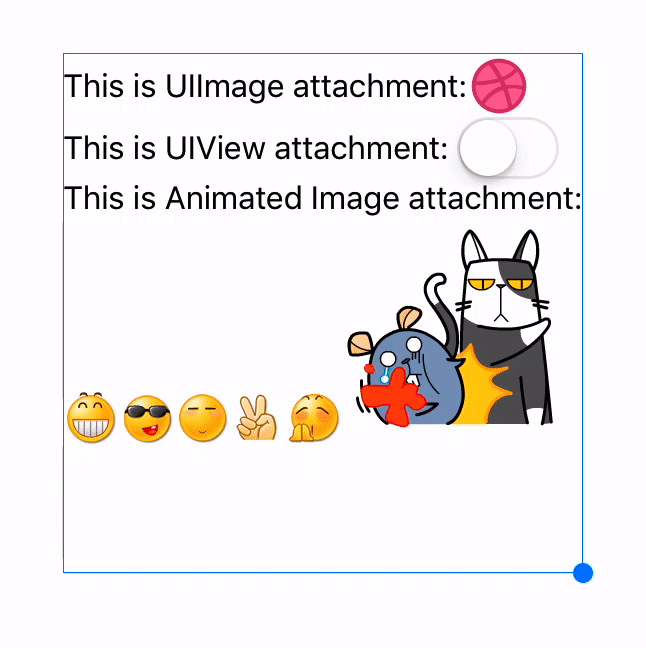
let text = NSMutableAttributedString()
let font = UIFont.systemFont(ofSize: 16)

// UIImage attachment
let image = UIImage.init(named: "dribbble64_imageio")
guard let attachment = NSMutableAttributedString.bs_attachmentString(with: image, contentMode: .center, attachmentSize: image?.size ?? .zero, alignTo: font, alignment: .center) else {
    return
}
text.append(attachment)

// UIView attachment
let switcher = UISwitch()
switcher.sizeToFit()
guard let attachment1 = NSMutableAttributedString.bs_attachmentString(with: switcher, contentMode: .center, attachmentSize: switcher.frame.size, alignTo: font, alignment: .center) else {
    return
}
text.append(attachment1)

// CALayer attachment
let layer = CAShapeLayer()
layer.path = ...
guard let attachment2 = NSMutableAttributedString.bs_attachmentString(with: layer, contentMode: .center, attachmentSize: layer.frame.size, alignTo: font, alignment: .center) else {
    return
}
text.append(attachment2)
Text layout calculation
let text = NSAttributedString()
let size = CGSize(width: 100, height: CGFloat.greatestFiniteMagnitude)
let container = TextContainer()
container.size = size
guard let layout = TextLayout(container: container, text: text) else {
    return
}

// get text bounding
layout.textBoundingRect // get bounding rect
layout.textBoundingSize // get bounding size

// query text layout
layout.lineIndex(for: CGPoint(x: 10, y: 10))
layout.closestLineIndex(for: CGPoint(x: 10, y: 10))
layout.closestPosition(to: CGPoint(x: 10, y: 10))
layout.textRange(at: CGPoint(x: 10, y: 10))
layout.rect(for: TextRange(range: NSRange(location: 10, length: 2)))
layout.selectionRects(for: TextRange(range: NSRange(location: 10, length: 2)))

// text layout display
let label = BSLabel()
label.frame = CGRect(x: 0, y: 0, width: layout.textBoundingSize.width, height: layout.textBoundingSize.height)
label.textLayout = layout;
Adjust text line position
// Convenience methods:
// 1. Create a text line position modifier, implements `TextLinePositionModifier` protocol.
// 2. Set it to label or text view.

let modifier = TextLinePositionSimpleModifier()
modifier.fixedLineHeight = 24

let label = BSLabel()
label.linePositionModifier = modifier

// Fully control
let modifier = TextLinePositionSimpleModifier()
modifier.fixedLineHeight = 24

let container = TextContainer()
container.size = CGSize(width: 100, height: CGFloat.greatestFiniteMagnitude)
container.linePositionModifier = modifier

guard let layout = TextLayout(container: container, text: text) else {
    return
}
let label = BSLabel()
label.size = layout.textBoundingSize
label.textLayout = layout
Asynchronous layout and rendering
// If you have performance issues,
// you may enable the asynchronous display mode.
let label = BSLabel()
label.displaysAsynchronously = true

// If you want to get the highest performance, you should do
// text layout with `TextLayout` class in background thread.
let label = BSLabel()
label.displaysAsynchronously = true
label.ignoreCommonProperties = true

DispatchQueue.global().async {
    // Create attributed string.
    let text = NSMutableAttributedString(string: "Some Text")
    text.bs_font = UIFont.systemFont(ofSize: 16)
    text.bs_color = UIColor.gray
    text.bs_set(color: .red, range: NSRange(location: 0, length: 4))

    // Create text container
    let container = TextContainer()
    container.size = CGSize(width: 100, height: CGFloat.greatestFiniteMagnitude);
    container.maximumNumberOfRows = 0;

    // Generate a text layout.
    let layout = TextLayout(container: container, text: text)

    DispatchQueue.main.async {
        label.frame = CGRect(x: 0, y: 0, width: layout.textBoundingSize.width, height: layout.textBoundingSize.height)
        label.textLayout = layout;
    }
}
Text container control
let label = BSLabel()
label.textContainerPath = UIBezierPath(...)
label.exclusionPaths = [UIBezierPath(), ...]
label.textContainerInset = UIEdgeInsets(...)
label.verticalForm = true/false

let textView = BSTextView()
textView.exclusionPaths = [UIBezierPath(), ...]
textView.textContainerInset = UIEdgeInsets(...)
textView.verticalForm = true/false
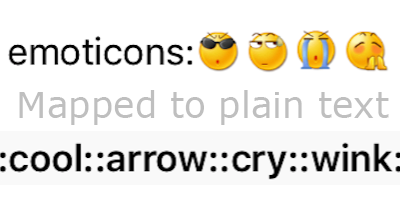
Text parser
// 1. Create a text parser
let simpleEmoticonParser = TextSimpleEmoticonParser()
var mapper = [String: UIImage]()
mapper[":smile:"] = UIImage.init(named: "smile.png")
mapper[":cool:"] = UIImage.init(named: "cool.png")
mapper[":cry:"] = UIImage.init(named: "cry.png")
mapper[":wink:"] = UIImage.init(named: "wink.png")
simpleEmoticonParser.emoticonMapper = mapper;

let markdownParser = TextSimpleMarkdownParser()
markdownParser.setColorWithDarkTheme()

let parser = MyCustomParser() // custom parser

// 2. Attach parser to label or text view
let label = BSLabel()
label.textParser = parser

let textView = BSTextView()
textView.textParser = parser
Debug
// Set a shared debug option to show text layout result.
let debugOption = TextDebugOption()
debugOption.baselineColor = .red
debugOption.ctFrameBorderColor = .red
debugOption.ctLineFillColor = UIColor(red: 0, green: 0.463, blue: 1, alpha: 0.18)
debugOption.cgGlyphBorderColor = UIColor(red: 1, green: 0.524, blue: 0, alpha: 0.2)
TextDebugOption.setSharedDebugOption(debugOption)
More examples
See Demo/BSTextDemo.xcodeproj for more examples:

Installation
CocoaPods
- Add
pod 'BSText'to your Podfile. - Run
pod installorpod update. - Import Module
import BSText, use@import BSText;in OC project.
Carthage
- Add
github "a1049148527/BSText"to your Cartfile. - Run
carthage update --platform iosand add the framework to your project. - Import Module
import BSText, use@import BSText;in OC project.
Manually
- Download all the files in the
BSTextsubdirectory. - Add the source files to your Xcode project.
- Link with required frameworks:
- UIKit
- CoreFoundation
- CoreText
- QuartzCore
- Accelerate
- MobileCoreServices
- Now you can use it.
Notice
You may add YYImage or YYWebImage to your project if you want to support animated image (GIF/APNG/WebP).
Documentation
API documentation is same as YYText, you can see it on CocoaDocs.
You can also install documentation locally using appledoc.
Requirements
This library requires iOS 8.0+ and Xcode 10.0+.
License
BSText is released under the MIT license. See LICENSE file for details.
中文介绍
功能强大的 iOS 富文本编辑与显示框架。
(该项目是 YYText 的 Swift 版本,项目的前缀 'BS' 来自于 BlueSky,就是创作了《冰河世纪》系列电影的 BlueSky 工作室)
特性
- API 兼容 UILabel 和 UITextView
- 支持高性能的异步排版和渲染
- 扩展了 CoreText 的属性以支持更多文字效果
- 支持 UIImage、UIView、CALayer 作为图文混排元素
- 支持添加自定义样式的、可点击的文本高亮范围
- 支持自定义文本解析 (内置简单的 Markdown/表情解析)
- 支持文本容器路径、内部留空路径的控制
- 支持文字竖排版,可用于编辑和显示中日韩文本
- 支持图片和富文本的复制粘贴
- 文本编辑时,支持富文本占位符
- 支持自定义键盘视图
- 撤销和重做次数的控制
- 富文本的序列化与反序列化支持
- 支持多语言,支持 VoiceOver
- 全部代码都有文档注释
架构
本项目架构与 YYText 保持一致
文本属性
BSText 原生支持的属性
| Demo | Attribute Name | Class |
|---|---|---|
|
TextAttachment | TextAttachment |
|
TextHighlight | TextHighlight |
|
TextBinding | TextBinding |
|
TextShadow TextInnerShadow |
TextShadow |
|
TextBorder | TextBorder |
|
TextBackgroundBorder | TextBorder |
|
TextBlockBorder | TextBorder |
|
TextGlyphTransform | NSValue(CGAffineTransform) |
|
TextUnderline | TextDecoration |
|
TextStrickthrough | TextDecoration |
|
TextBackedString | TextBackedString |
BSText 支持的 CoreText 属性
| Demo | Attribute Name | Class |
|---|---|---|
|
Font | UIFont(CTFontRef) |
|
Kern | NSNumber |
|
StrokeWidth | NSNumber |
|
StrokeColor | CGColorRef |
|
Shadow | NSShadow |
|
Ligature | NSNumber |
|
VerticalGlyphForm | NSNumber(BOOL) |
|
WritingDirection | NSArray(NSNumber) |
|
RunDelegate | CTRunDelegateRef |
|
TextAlignment | NSParagraphStyle (NSTextAlignment) |
|
LineBreakMode | NSParagraphStyle (NSLineBreakMode) |
|
LineSpacing | NSParagraphStyle (CGFloat) |
|
ParagraphSpacing ParagraphSpacingBefore |
NSParagraphStyle (CGFloat) |
|
FirstLineHeadIndent | NSParagraphStyle (CGFloat) |
|
HeadIndent | NSParagraphStyle (CGFloat) |
|
TailIndent | NSParagraphStyle (CGFloat) |
|
MinimumLineHeight | NSParagraphStyle (CGFloat) |
|
MaximumLineHeight | NSParagraphStyle (CGFloat) |
|
LineHeightMultiple | NSParagraphStyle (CGFloat) |
|
BaseWritingDirection | NSParagraphStyle (NSWritingDirection) |
|
DefaultTabInterval TabStops |
NSParagraphStyle CGFloat/NSArray(NSTextTab) |
用法
基本用法
// BSLabel (和 UILabel 用法一致)
let label = BSLabel()
label.frame = ...
label.font = ...
label.textColor = ...
label.textAlignment = ...
label.lineBreakMode = ...
label.numberOfLines = ...
label.text = ...

// BSTextView (和 UITextView 用法一致)
let textView = BSTextView()
textView.frame = ...
textView.font = ...
textView.textColor = ...
textView.dataDetectorTypes = ...
textView.placeHolderText = ...
textView.placeHolderTextColor = ...
textView.delegate = ...
属性文本
// 1. 创建一个属性文本
let text = NSMutableAttributedString(string: "Some Text, blabla...")

// 2. 为文本设置属性
text.bs_font = UIFont.boldSystemFont(ofSize:30)
text.bs_color = UIColor.blue
text.bs_set(color: UIColor.red, range: NSRange(location: 0, length: 4))
text.bs_lineSpacing = 10

// 3. 赋值到 BSLabel 或 BSTextView
let label = BSLabel()
label.frame = CGRect(x: 15, y: 100, width: 200, height: 80)
label.attributedText = text

let textView = BSTextView()
textView.frame = CGRect(x: 15, y: 200, width: 200, height: 80)
textView.attributedText = text
文本高亮
你可以用一些已经封装好的简便方法来设置文本高亮:
text.bs_set(textHighlightRange: range,
            color: UIColor.blue,
            backgroundColor: UIColor.gray) { (view, text, range, rect) in
    print("tap text range:...")
}
或者用更复杂的办法来调节文本高亮的细节:
// 1. 创建一个"高亮"属性,当用户点击了高亮区域的文本时,"高亮"属性会替换掉原本的属性
let border = TextBorder.border(with: UIColor.gray, cornerRadius: 3)

let highlight = TextHighlight()
highlight.color = .white
highlight.backgroundBorder = highlightBorder
highlight.tapAction = { (containerView, text, range, rect) in
    print("tap text range:...")
    // 你也可以把事件回调放到 BSLabel 和 BSTextView 来处理。
}

// 2. 把"高亮"属性设置到某个文本范围
let attributedText = NSMutableAttributedString(string: " ")
attributedText.bs_set(textHighlight: highlight, range: highlightRange)

// 3. 把属性文本设置到 BSLabel 或 BSTextView
let label = BSLabel()
label.attributedText = attributedText

let textView = BSTextView()
textView.delegate = self
textView.attributedText = ...

// 4. 接受事件回调
label.highlightTapAction = { (containerView, text, range, rect) in
    print("tap text range:...")
};
label.highlightLongPressAction = { (containerView, text, range, rect) in
    print("tap text range:...")
};

// MARK: - TextViewDelegate
func textView(_ textView: BSTextView, didTap highlight: TextHighlight, in characterRange: NSRange, rect: CGRect) {
    print("tap text range:...")
}
func textView(_ textView: BSTextView, didLongPress highlight: TextHighlight, in characterRange: NSRange, rect: CGRect) {
    print("tap text range:...")
}
图文混排
let text = NSMutableAttributedString()
let font = UIFont.systemFont(ofSize: 16)

// 嵌入 UIImage
let image = UIImage.init(named: "dribbble64_imageio")
guard let attachment = NSMutableAttributedString.bs_attachmentString(with: image, contentMode: .center, attachmentSize: image?.size ?? .zero, alignTo: font, alignment: .center) else {
    return
}
text.append(attachment)

// 嵌入 UIView
let switcher = UISwitch()
switcher.sizeToFit()
guard let attachment1 = NSMutableAttributedString.bs_attachmentString(with: switcher, contentMode: .center, attachmentSize: switcher.frame.size, alignTo: font, alignment: .center) else {
    return
}
text.append(attachment1)

// 嵌入 CALayer
let layer = CAShapeLayer()
layer.path = ...
guard let attachment2 = NSMutableAttributedString.bs_attachmentString(with: layer, contentMode: .center, attachmentSize: layer.frame.size, alignTo: font, alignment: .center) else {
    return
}
text.append(attachment2)
文本布局计算
let text = NSAttributedString()
let size = CGSize(width: 100, height: CGFloat.greatestFiniteMagnitude)
let container = TextContainer()
container.size = size
guard let layout = TextLayout(container: container, text: text) else {
    return
}

// 获取文本显示位置和大小
layout.textBoundingRect // get bounding rect
layout.textBoundingSize // get bounding size

 // 查询文本排版结果
layout.lineIndex(for: CGPoint(x: 10, y: 10))
layout.closestLineIndex(for: CGPoint(x: 10, y: 10))
layout.closestPosition(to: CGPoint(x: 10, y: 10))
layout.textRange(at: CGPoint(x: 10, y: 10))
layout.rect(for: TextRange(range: NSRange(location: 10, length: 2)))
layout.selectionRects(for: TextRange(range: NSRange(location: 10, length: 2)))

// 显示文本排版结果
let label = BSLabel()
label.frame = CGRect(x: 0, y: 0, width: layout.textBoundingSize.width, height: layout.textBoundingSize.height)
label.textLayout = layout;
文本行位置调整
// 由于中文、英文、Emoji 等字体高度不一致,或者富文本中出现了不同字号的字体,
// 可能会造成每行文字的高度不一致。这里可以添加一个修改器来实现固定行高,或者自定义文本行位置。

// 简单的方法:
// 1. 创建一个文本行位置修改类,实现 `TextLinePositionModifier` 协议。
// 2. 设置到 Label 或 TextView。

let modifier = TextLinePositionSimpleModifier()
modifier.fixedLineHeight = 24

let label = BSLabel()
label.linePositionModifier = modifier

// 完全控制:
let modifier = TextLinePositionSimpleModifier()
modifier.fixedLineHeight = 24

let container = TextContainer()
container.size = CGSize(width: 100, height: CGFloat.greatestFiniteMagnitude)
container.linePositionModifier = modifier

guard let layout = TextLayout(container: container, text: text) else {
    return
}
let label = BSLabel()
label.size = layout.textBoundingSize
label.textLayout = layout
异步排版和渲染
// 如果你在显示字符串时有性能问题,可以这样开启异步模式:
let label = BSLabel()
label.displaysAsynchronously = true

// 如果需要获得最高的性能,你可以在后台线程用 `TextLayout` 进行预排版:
let label = BSLabel()
label.displaysAsynchronously = true // 开启异步绘制
label.ignoreCommonProperties = true // 忽略除了 textLayout 之外的其他属性

DispatchQueue.global().async {
    // 创建属性字符串
    let text = NSMutableAttributedString(string: "Some Text")
    text.bs_font = UIFont.systemFont(ofSize: 16)
    text.bs_color = UIColor.gray
    text.bs_set(color: .red, range: NSRange(location: 0, length: 4))

    // 创建文本容器
    let container = TextContainer()
    container.size = CGSize(width: 100, height: CGFloat.greatestFiniteMagnitude);
    container.maximumNumberOfRows = 0;

    // 生成排版结果
    let layout = TextLayout(container: container, text: text)

    DispatchQueue.main.async {
        label.frame = CGRect(x: 0, y: 0, width: layout.textBoundingSize.width, height: layout.textBoundingSize.height)
        label.textLayout = layout;
    }
}
文本容器控制
let label = BSLabel()
label.textContainerPath = UIBezierPath(...)
label.exclusionPaths = [UIBezierPath(), ...]
label.textContainerInset = UIEdgeInsets(...)
label.verticalForm = true/false

let textView = BSTextView()
textView.exclusionPaths = [UIBezierPath(), ...]
textView.textContainerInset = UIEdgeInsets(...)
textView.verticalForm = true/false
文本解析
// 1. 创建一个解析器

// 内置简单的表情解析
let simpleEmoticonParser = TextSimpleEmoticonParser()
var mapper = [String: UIImage]()
mapper[":smile:"] = UIImage.init(named: "smile.png")
mapper[":cool:"] = UIImage.init(named: "cool.png")
mapper[":cry:"] = UIImage.init(named: "cry.png")
mapper[":wink:"] = UIImage.init(named: "wink.png")
simpleEmoticonParser.emoticonMapper = mapper;

// 内置简单的 markdown 解析
let markdownParser = TextSimpleMarkdownParser()
markdownParser.setColorWithDarkTheme()

// 实现 `TextParser` 协议的自定义解析器
let parser = MyCustomParser()

// 2. 把解析器添加到 BSLabel 或 BSTextView
let label = BSLabel()
label.textParser = parser

let textView = BSTextView()
textView.textParser = parser
Debug
// 设置一个全局的 debug option 来显示排版结果。
let debugOption = TextDebugOption()
debugOption.baselineColor = .red
debugOption.ctFrameBorderColor = .red
debugOption.ctLineFillColor = UIColor(red: 0, green: 0.463, blue: 1, alpha: 0.18)
debugOption.cgGlyphBorderColor = UIColor(red: 1, green: 0.524, blue: 0, alpha: 0.2)
TextDebugOption.setSharedDebugOption(debugOption)
更多示例
查看演示工程 Demo/BSTextDemo.xcodeproj:
安装
CocoaPods
-
在 Podfile 中添加
pod 'BSText'。source 'https://github.com/CocoaPods/Specs.git' platform :ios, '8.0' use_frameworks! target 'MyApp' do # your other pod # ... pod 'BSText', '~> 1.0' end -
执行
pod install或pod update。 -
导入模块
import BSText,OC 项目中使用@import BSText;。
Carthage
- 在 Cartfile 中添加
github "a1049145827/BSText"。 - 执行
carthage update --platform ios并将生成的 framework 添加到你的工程。 - 导入模块
import BSText,OC 项目中使用@import BSText;。
手动安装
- 下载 BSText 文件夹内的所有内容。
- 将 BSText 内的源文件添加(拖放)到你的工程。
- 链接以下 frameworks:
- UIKit
- CoreFoundation
- CoreText
- QuartzCore
- Accelerate
- MobileCoreServices
- 导入模块
import BSText,OC 项目中使用@import BSText;。
注意
你可以添加 YYImage 或 YYWebImage 到你的工程,以支持动画格式(GIF/APNG/WebP)的图片。
文档
本项目目前还没有生成在线文档,你可以在 CocoaDocs 查看 YYText 的在线 API 文档,也可以用 appledoc 本地生成文档。
系统要求
该项目最低支持 iOS 8.0 和 Xcode 10.0。
已知问题
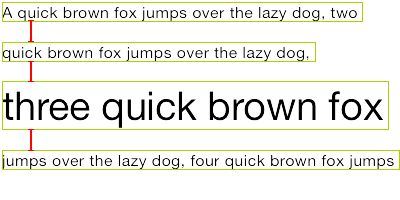
- 与 YYText 一样,BSText 并不能支持所有 CoreText/TextKit 的属性,比如 NSBackgroundColor、NSStrikethrough、NSUnderline、NSAttachment、NSLink 等,但 BSText 中基本都有对应属性作为替代。详情见上方表格。
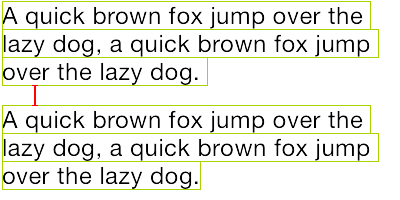
- BSTextView 未实现局部刷新,所以在输入和编辑大量的文本(比如超过大概五千个汉字、或大概一万个英文字符)时会出现较明显的卡顿现象。
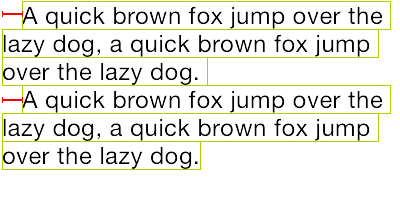
- 竖排版时,添加 exclusionPaths 在少数情况下可能会导致文本显示空白。
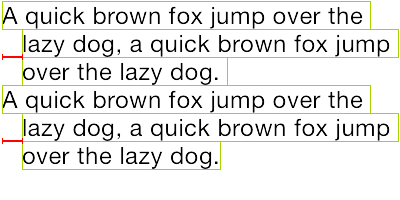
- 当添加了非矩形的 textContainerPath,并且有嵌入大于文本排版方向宽度的 RunDelegate 时,RunDelegate 之后的文字会无法显示。这是 CoreText 的 Bug(或者说是 Feature)。
许可证
BSText 使用 MIT 许可证,详情见 LICENSE 文件。