NMLocalizedPhoneCountryView

NMLocalizedPhoneCountryView is a simple, customizable view for selecting countries in iOS apps.
You can clone/download the repository and run the demo project to see NMLocalizedPhoneCountryView in action. First run pod install from the NMLocalizedPhoneCountryViewDemo directory.


Installation
Releases are Swift 4.2 compatible only.
Cocoapods
NMLocalizedPhoneCountryView is available through CocoaPods. Simply add the following to your Podfile:
use_frameworks!

target '<Your Target Name>' do
  pod 'NMLocalizedPhoneCountryView'
end
Manual
- Put
NMLocalizedPhoneCountryViewrepo somewhere in your project directory. - In Xcode, add
NMLocalizedPhoneCountryView.xcodeprojto your project. - On your app's target, add the NMLocalizedPhoneCountryView framework:
- as an embedded binary on the General tab.
- as a target dependency on the Build Phases tab.
Usage
If you're using Storyboards/Interface Builder you can create a NMLocalizedPhoneCountryView instance by adding a UIView to your Storyboard, and then manually changing the view's class to NMLocalizedPhoneCountryView in the "Custom Class" field of the Identity Inspector tab on the Utilities panel (the right-side panel)
You can also create an instance of NMLocalizedPhoneCountryView programmatically:
import NMLocalizedPhoneCountryView
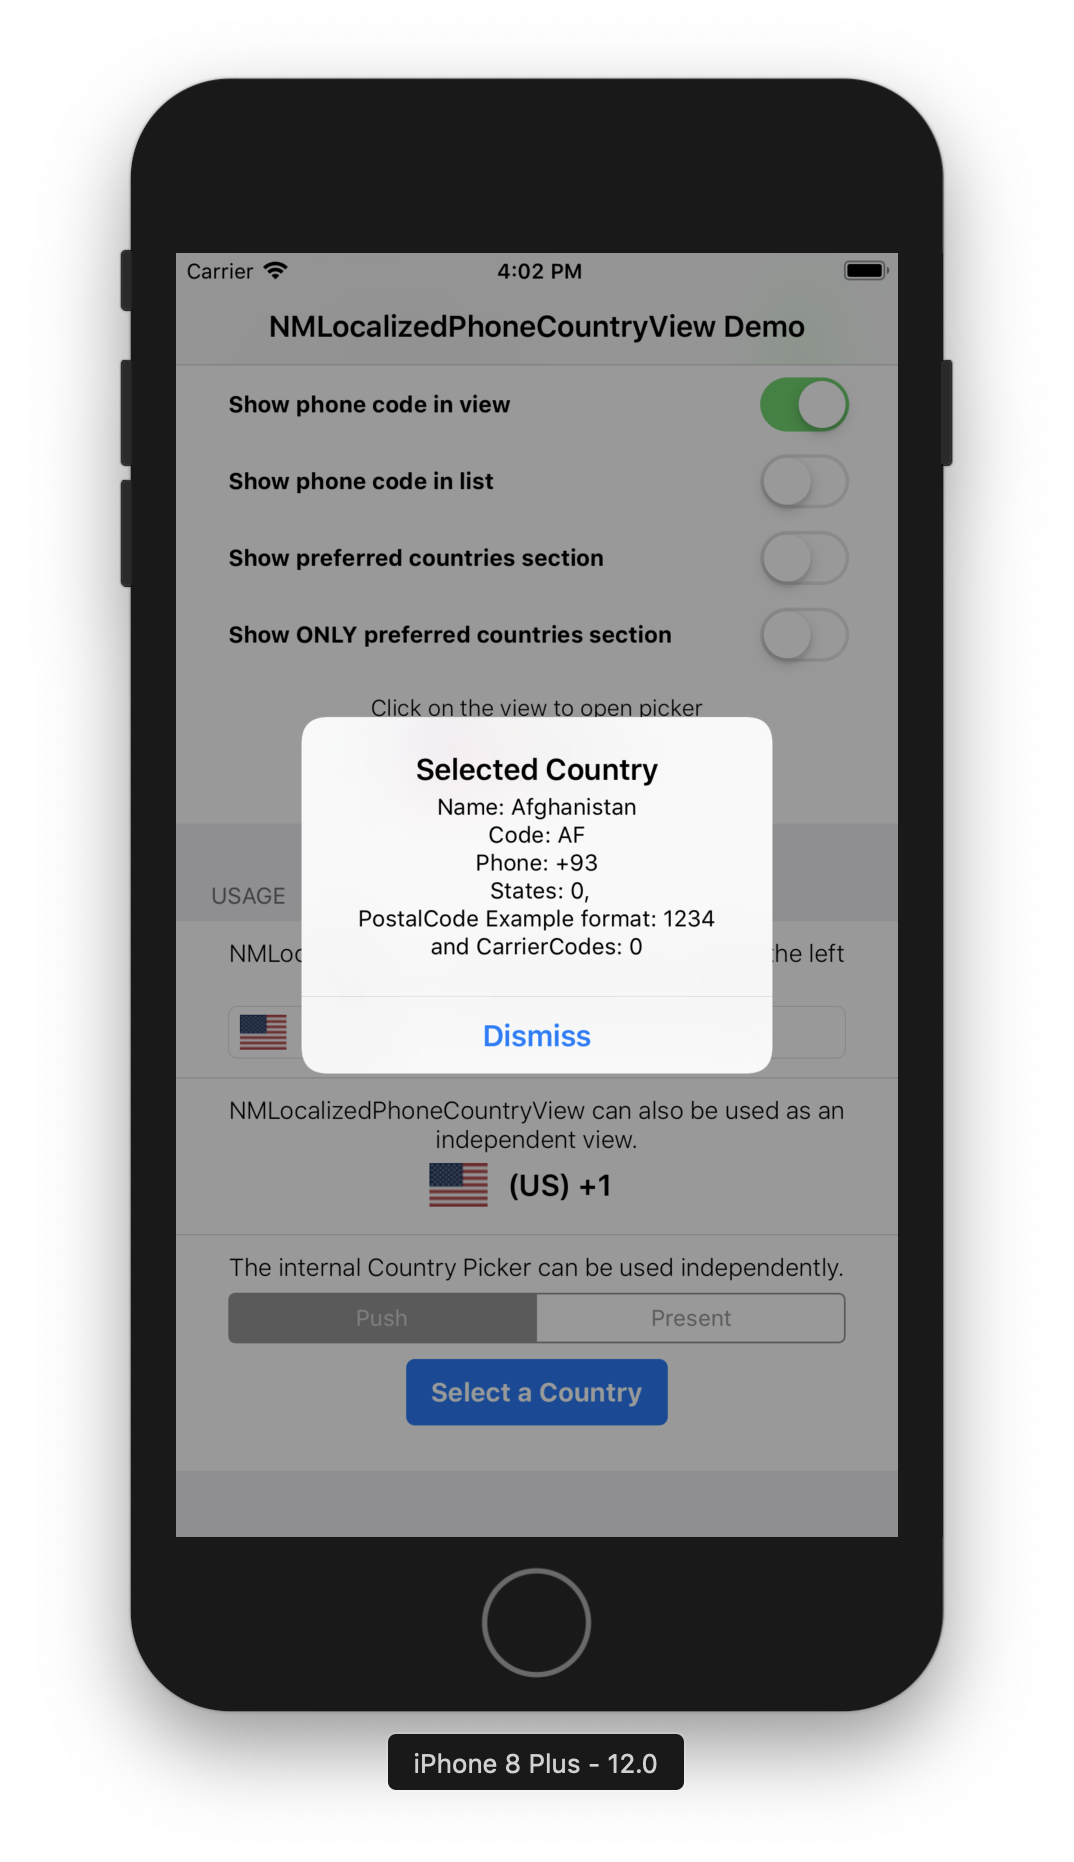
let cpv = NMLocalizedPhoneCountryView(frame: /**Desired frame**/)Selected Country
To get the selected country from your NMLocalizedPhoneCountryView instance at any time, use the selectedCountry property.
let country = cpv.selectedCountry
print(country)
This property is not optional, the default value is the user's current country, derived from the device's current Locale.
States of selected country
You can also create see the list of states of your selected country.
let statesCount = cpv.selectedCountry.states.count
print("statesCount \(statesCount)")
Carrier-codes of selected country
You can also create see the carrier codes of your selected country, if any. The default is empty carrier codes array.
let carrierCodesCount = cpv.selectedCountry.carrierCodes.count
print("carrierCodesCount \(carrierCodesCount)")
Postal code of selected country
You can also see the Postal Code format for your selected country, if any. The default value is empty string.
let postalCodeFormat = cpv.selectedCountry.postalCode
print("postalCodeFormat \(postalCodeFormat)")
Changing locale of countries view
Change your app locale using
cpvMain.localeSetup = NMLocaleSetup(baseLocale: sender.isOn ? "ar" : "Base", isRTL: sender.isOn)
and see the same list of countries in other locale. We've use Arabic locale in our demo project and our Base locale is English
Adding new locale for countries view
If you want to support new locale using this library, there are two ways:
1. Adding new locale in CountryCodes.json
Create a new PR and add new country locale in the json file of the original library.
e.g.
{
    "name": "United Arab Emirates",
    "name_ar": "الإمارات",
    "name_fr" : "Emirats Arabes Unis",  ---->> New locale
    "dial_code": "+971",
    "code": "AE",
    "postal_code": "",
    "carrier_codes": [],
    "states": []
}
2. Use your list of countries
Instead of using the countries list provided in CountryCodes.json file, you can use your own countries list either locally or from any API response and use it to populate the CountryView.
Note: Make sure the response format is the same as the current one, as this structure is mandatory for the library to work.
If the response format of your custom-countries-API is not correct, or it has wrong/empty data, NMLocalizedPhoneCountryView will fallback to our local CountryCodes.json file.
{
"name": "United Arab Emirates",
"name_ar": "الإمارات",
"dial_code": "+971",
"code": "AE",
"postal_code": "",
"carrier_codes": [],
"states": []
}
Note: If you've not added the translation for any country for a locale, it will show default name in English.
Exclude some countries from the main list
You can exclude those countries that you do not want to show in the main list as follows:
cpvMain.excludedCountriesList = ["AE", "QA", "SA", "OM", "KW", "BH"]
You have to pass the country codes of the excluded countries list in excludedCountriesList attribute of your countryView.
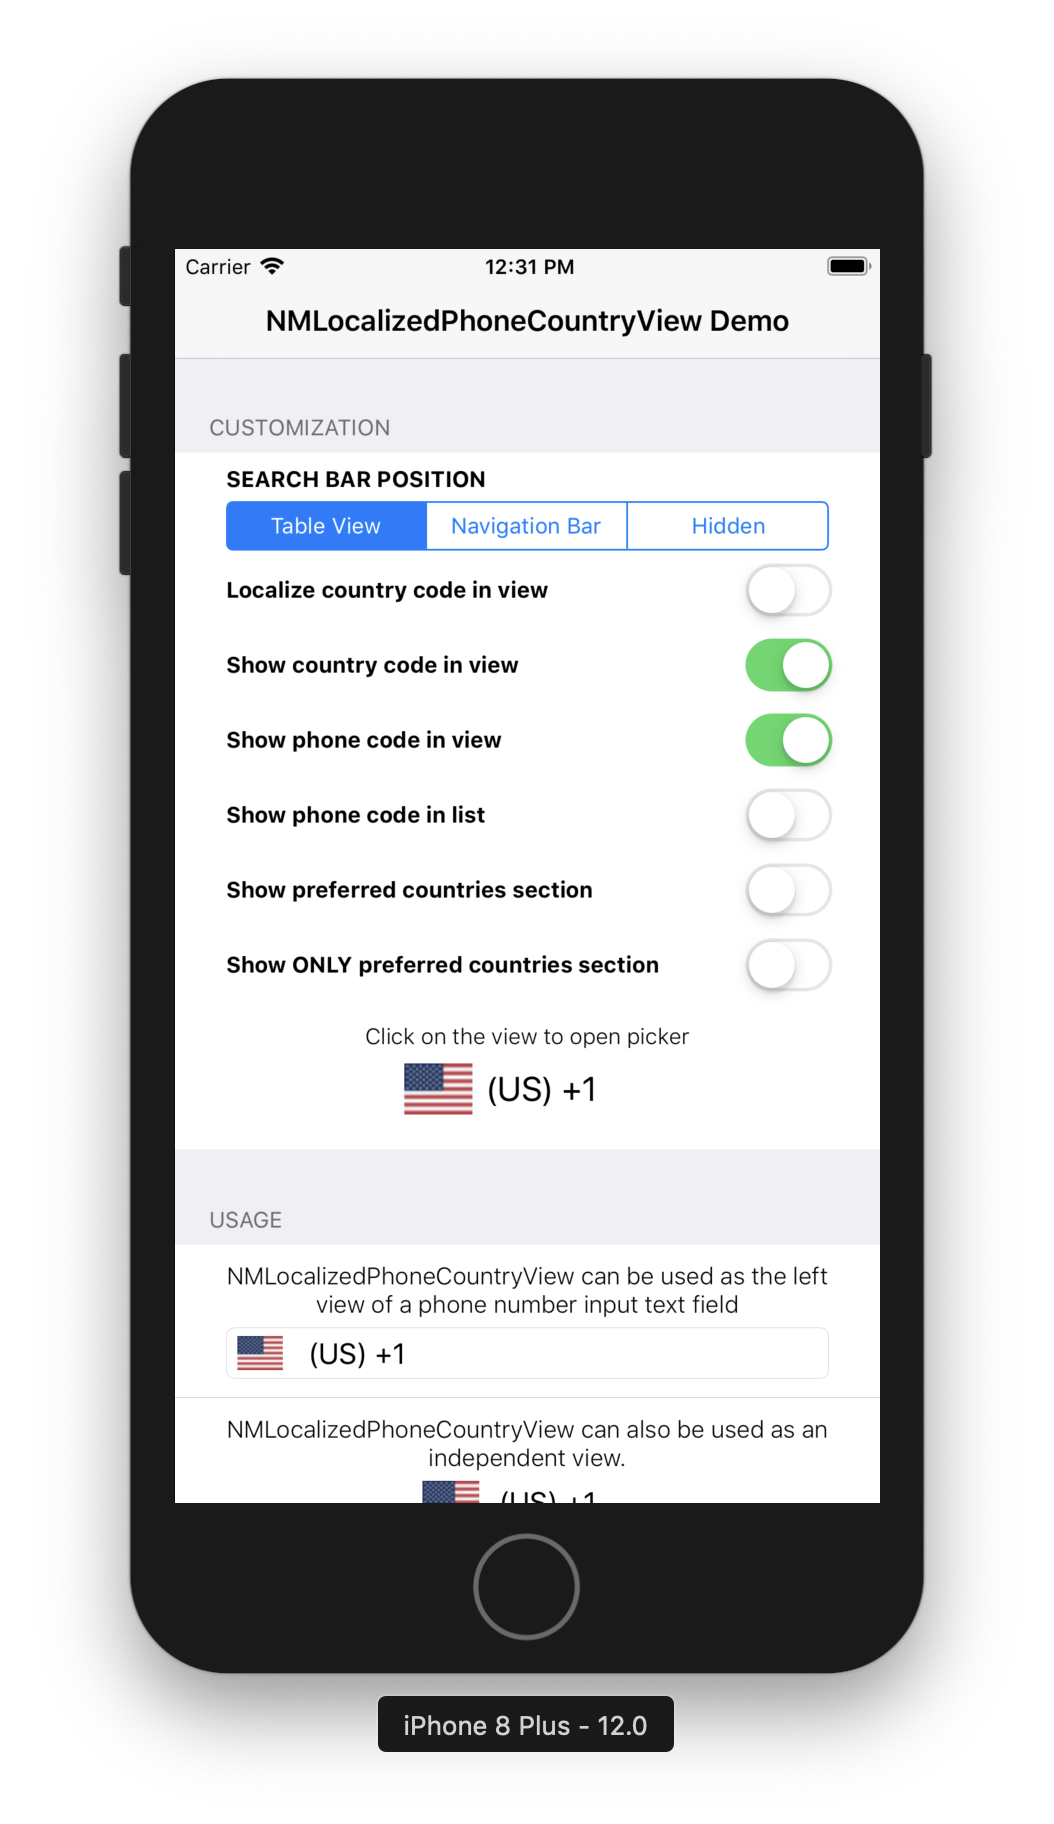
Customization
Customization options for the view itself are available directly via the NMLocalizedPhoneCountryView instance while options for the internal CountryView table view are available via the NMLocalizedPhoneCountryViewDataSource protocol. Setting the NMLocalizedPhoneCountryViewDelegate protocol is also necessary if you wish to be notified when the user selects a country from the list.
import NMLocalizedPhoneCountryView

class DemoViewController: UIViewController, NMLocalizedPhoneCountryViewDelegate, NMLocalizedPhoneCountryViewDataSource {

    @IBOutlet weak var localizedPhoneCountryView: NMLocalizedPhoneCountryView!

    override func viewDidLoad() {
        super.viewDidLoad()

        localizedPhoneCountryView.delegate = self
        localizedPhoneCountryView.dataSource = self

        /*** Direct customizations on NMLocalizedPhoneCountryView instance ***/

        // Show the selected country's phone(e.g +234) code on the view
        localizedPhoneCountryView.showPhoneCodeInView = true

        // Show the selected country's iso code(e.g NG) on the view
        localizedPhoneCountryView.showCountryCodeInView = true
    }

}
NMLocalizedPhoneCountryViewDelegate
The delegate function will be called when the user selects a country from the list or when you manually set the selectedCountry property of the NMLocalizedPhoneCountryView
func localizedPhoneCountryView(_ localizedPhoneCountryView: NMLocalizedPhoneCountryView, didSelectCountry country: NMCountry) {
	print(country)
}
NMLocalizedPhoneCountryViewDataSource
The datasource functions define the internal(country list) ViewController's behavior. Run the demo project to play around with the options.
-
An array of countries you wish to show at the top of the list. This is useful if your app is targeted towards people in specific countries.
func preferredCountries(in localizedPhoneCountryView: NMLocalizedPhoneCountryView) -> [NMCountry]
-
The desired title for the preferred section.
func sectionTitleForPreferredCountries(in localizedPhoneCountryView: NMLocalizedPhoneCountryView) -> String?
Note: You have to return a non-empty array of countries from
preferredCountries(in localizedPhoneCountryView: NMLocalizedPhoneCountryView)as well as this section title if you wish to show preferred countries on the list. Returning only the array or title will not work. -
Show ONLY the preferred countries section on the list. Default value is
falsefunc showOnlyPreferredSection(in localizedPhoneCountryView: NMLocalizedPhoneCountryView) -> Bool
Return
trueto hide the internal list so your users can only choose from the preferred countries list. -
The navigation item title when the internal view controller is pushed/presented. Default value is
nilfunc navigationTitle(in localizedPhoneCountryView: NMLocalizedPhoneCountryView) -> String?
-
A navigation item button to be used if the internal view controller is presented(not pushed). If nil is returned, a default "Close" button is used. This function only enables you return a button customized the way you want. Default value is
nilfunc closeButtonNavigationItem(in localizedPhoneCountryView: NMLocalizedPhoneCountryView) -> UIBarButtonItem?
Note: Any
targetoractionassociated with this button will be replaced as this button's sole purpose is to close the internal view controller. -
Desired position for the search bar. Default value is
.tableViewHeaderfunc searchBarPosition(in localizedPhoneCountryView: NMLocalizedPhoneCountryView) -> SearchBarPosition
Possible values are:
.tableViewHeader,.navigationBarand.hidden -
Show the phone code alongside the country name on the list. e.g Nigeria (+234). Default value is
falsefunc showPhoneCodeInList(in localizedPhoneCountryView: NMLocalizedPhoneCountryView) -> Bool
FontTrait
Define normal font family for your
NMLocalizedPhoneCountryViewand defineFontTraitfor yourUILabels insideNMLocalizedPhoneCountryViewandNMLocalizedPhoneCountryViewControllerrows. Simplify override the values forselectedCountryFontTraitandcountriesListFontTraitforNMLocalizedPhoneCountryViewandNMLocalizedPhoneCountryViewControllerrespectively.Possible values for
FontTraitare:
  public enum FontTrait {
    case normal, bold, italic
  }
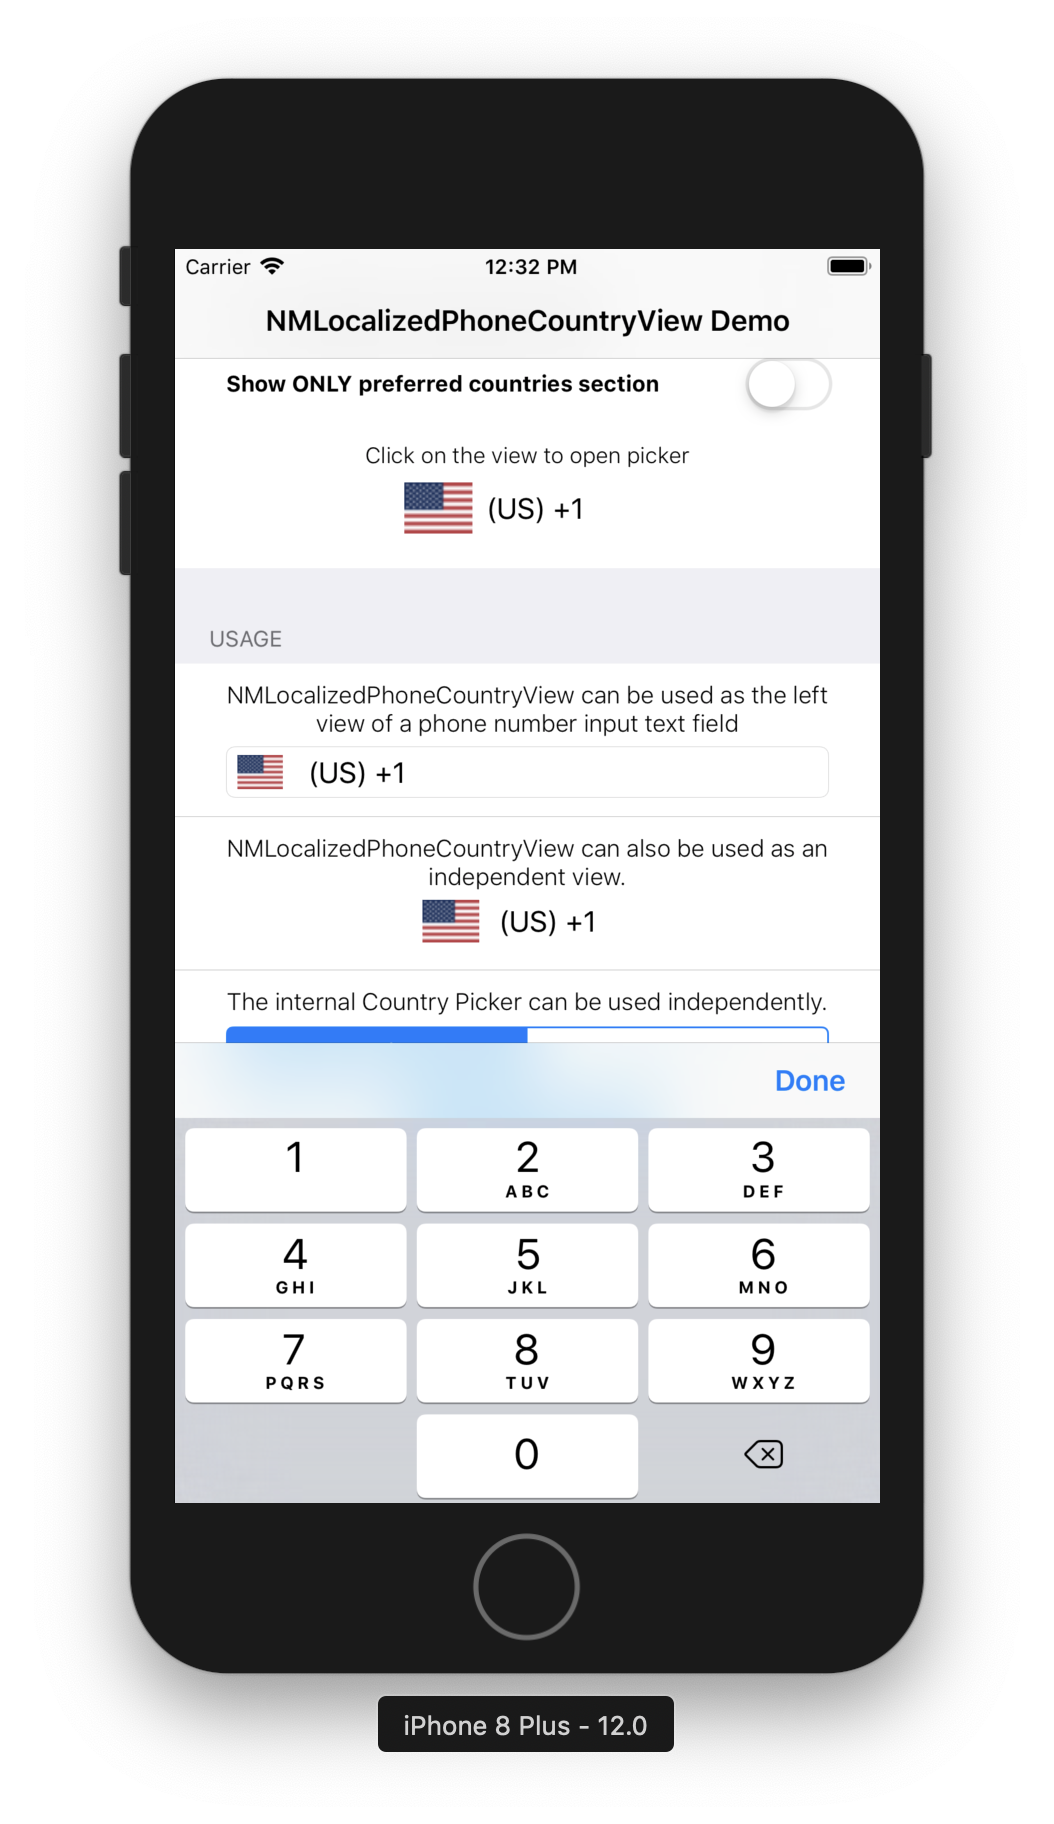
Using NMLocalizedPhoneCountryView with UITextField
A good use case for NMLocalizedPhoneCountryView is when used as the left view of a phone number input field.
class DemoViewController: UIViewController {

    @IBOutlet weak var phoneNumberField: UITextField!

    override func viewDidLoad() {
        super.viewDidLoad()

        let cpv = NMLocalizedPhoneCountryView(frame: CGRect(x: 0, y: 0, width: 120, height: 20))
        phoneNumberField.leftView = cpv
        phoneNumberField.leftViewMode = .always
    }
}
This means your users do not have to worry about entering the country's phone code in the text field. This also ensures you get a valid phone code from NMLocalizedPhoneCountryView instead of relying on your users.
Using the internal picker independently
If for any reason you do not want to show the default view or have your own implementation for showing country information, you can still use the internal picker to allow your users select countries from the list by calling the function showCountriesList(from: UIViewController) on a NMLocalizedPhoneCountryView instance.
It's important to keep a field reference to the NMLocalizedPhoneCountryView instance else it will be garbage collected and any attempt to use it will result to a crash.
class DemoViewController: UIViewController {

    // Keep a field reference
    let localizedPhoneCountryView = NMLocalizedPhoneCountryView()

    override func viewDidLoad() {
        super.viewDidLoad()
    }

    @IBAction func buttonPressed(_ sender: Any) {
        localizedPhoneCountryView.showCountriesList(from: self)
    }
}
In the example above, calling localizedPhoneCountryView.showCountriesList(from: self) will result in the internal picker view controller being presented in its own navigation stack because DemoViewController is not a navigation controller.
If you already have a navigation stack, you can push the internal picker view controller onto that stack by calling localizedPhoneCountryView.showCountriesList(from: self.navigationController!) or do it the safe way:
if let nav = self.navigationController {
	localizedPhoneCountryView.showCountriesList(from: nav)
}
Don't forget to set a delegate to be notified when the use selects a country from the list. An example of how to use the internal picker view controller is included in the demo project.
License
NMLocalizedPhoneCountryView is distributed under the MIT license. See LICENSE for details.
Originally inspired from CountryPickerView.