GodEye 1.1.2
| TestsTested | ✗ |
| LangLanguage | SwiftSwift |
| License | MIT |
| ReleasedLast Release | Mar 2017 |
| SwiftSwift Version | 3.0 |
| SPMSupports SPM | ✗ |
Maintained by zixun.
| Depends on: | |
| AppBaseKit | ~> 0.2.2 |
| Log4G | ~> 0.2.2 |
| AppSwizzle | ~> 1.1.2 |
| AssistiveButton | ~> 1.1.2 |
| ASLEye | ~> 1.1.1 |
| CrashEye | ~> 1.1.2 |
| ANREye | ~> 1.1.1 |
| SystemEye | ~> 0.2.2 |
| NetworkEye.swift | ~> 1.1.3 |
| LeakEye | ~> 1.1.3 |
| FileBrowser | ~> 0.2.0 |
| SwViewCapture | ~> 1.0.6 |
| SQLite.swift | ~> 0.11.1 |
| ESPullToRefresh | ~> 2.6 |
GodEye 1.1.2
- By
- zixun
- zixun_
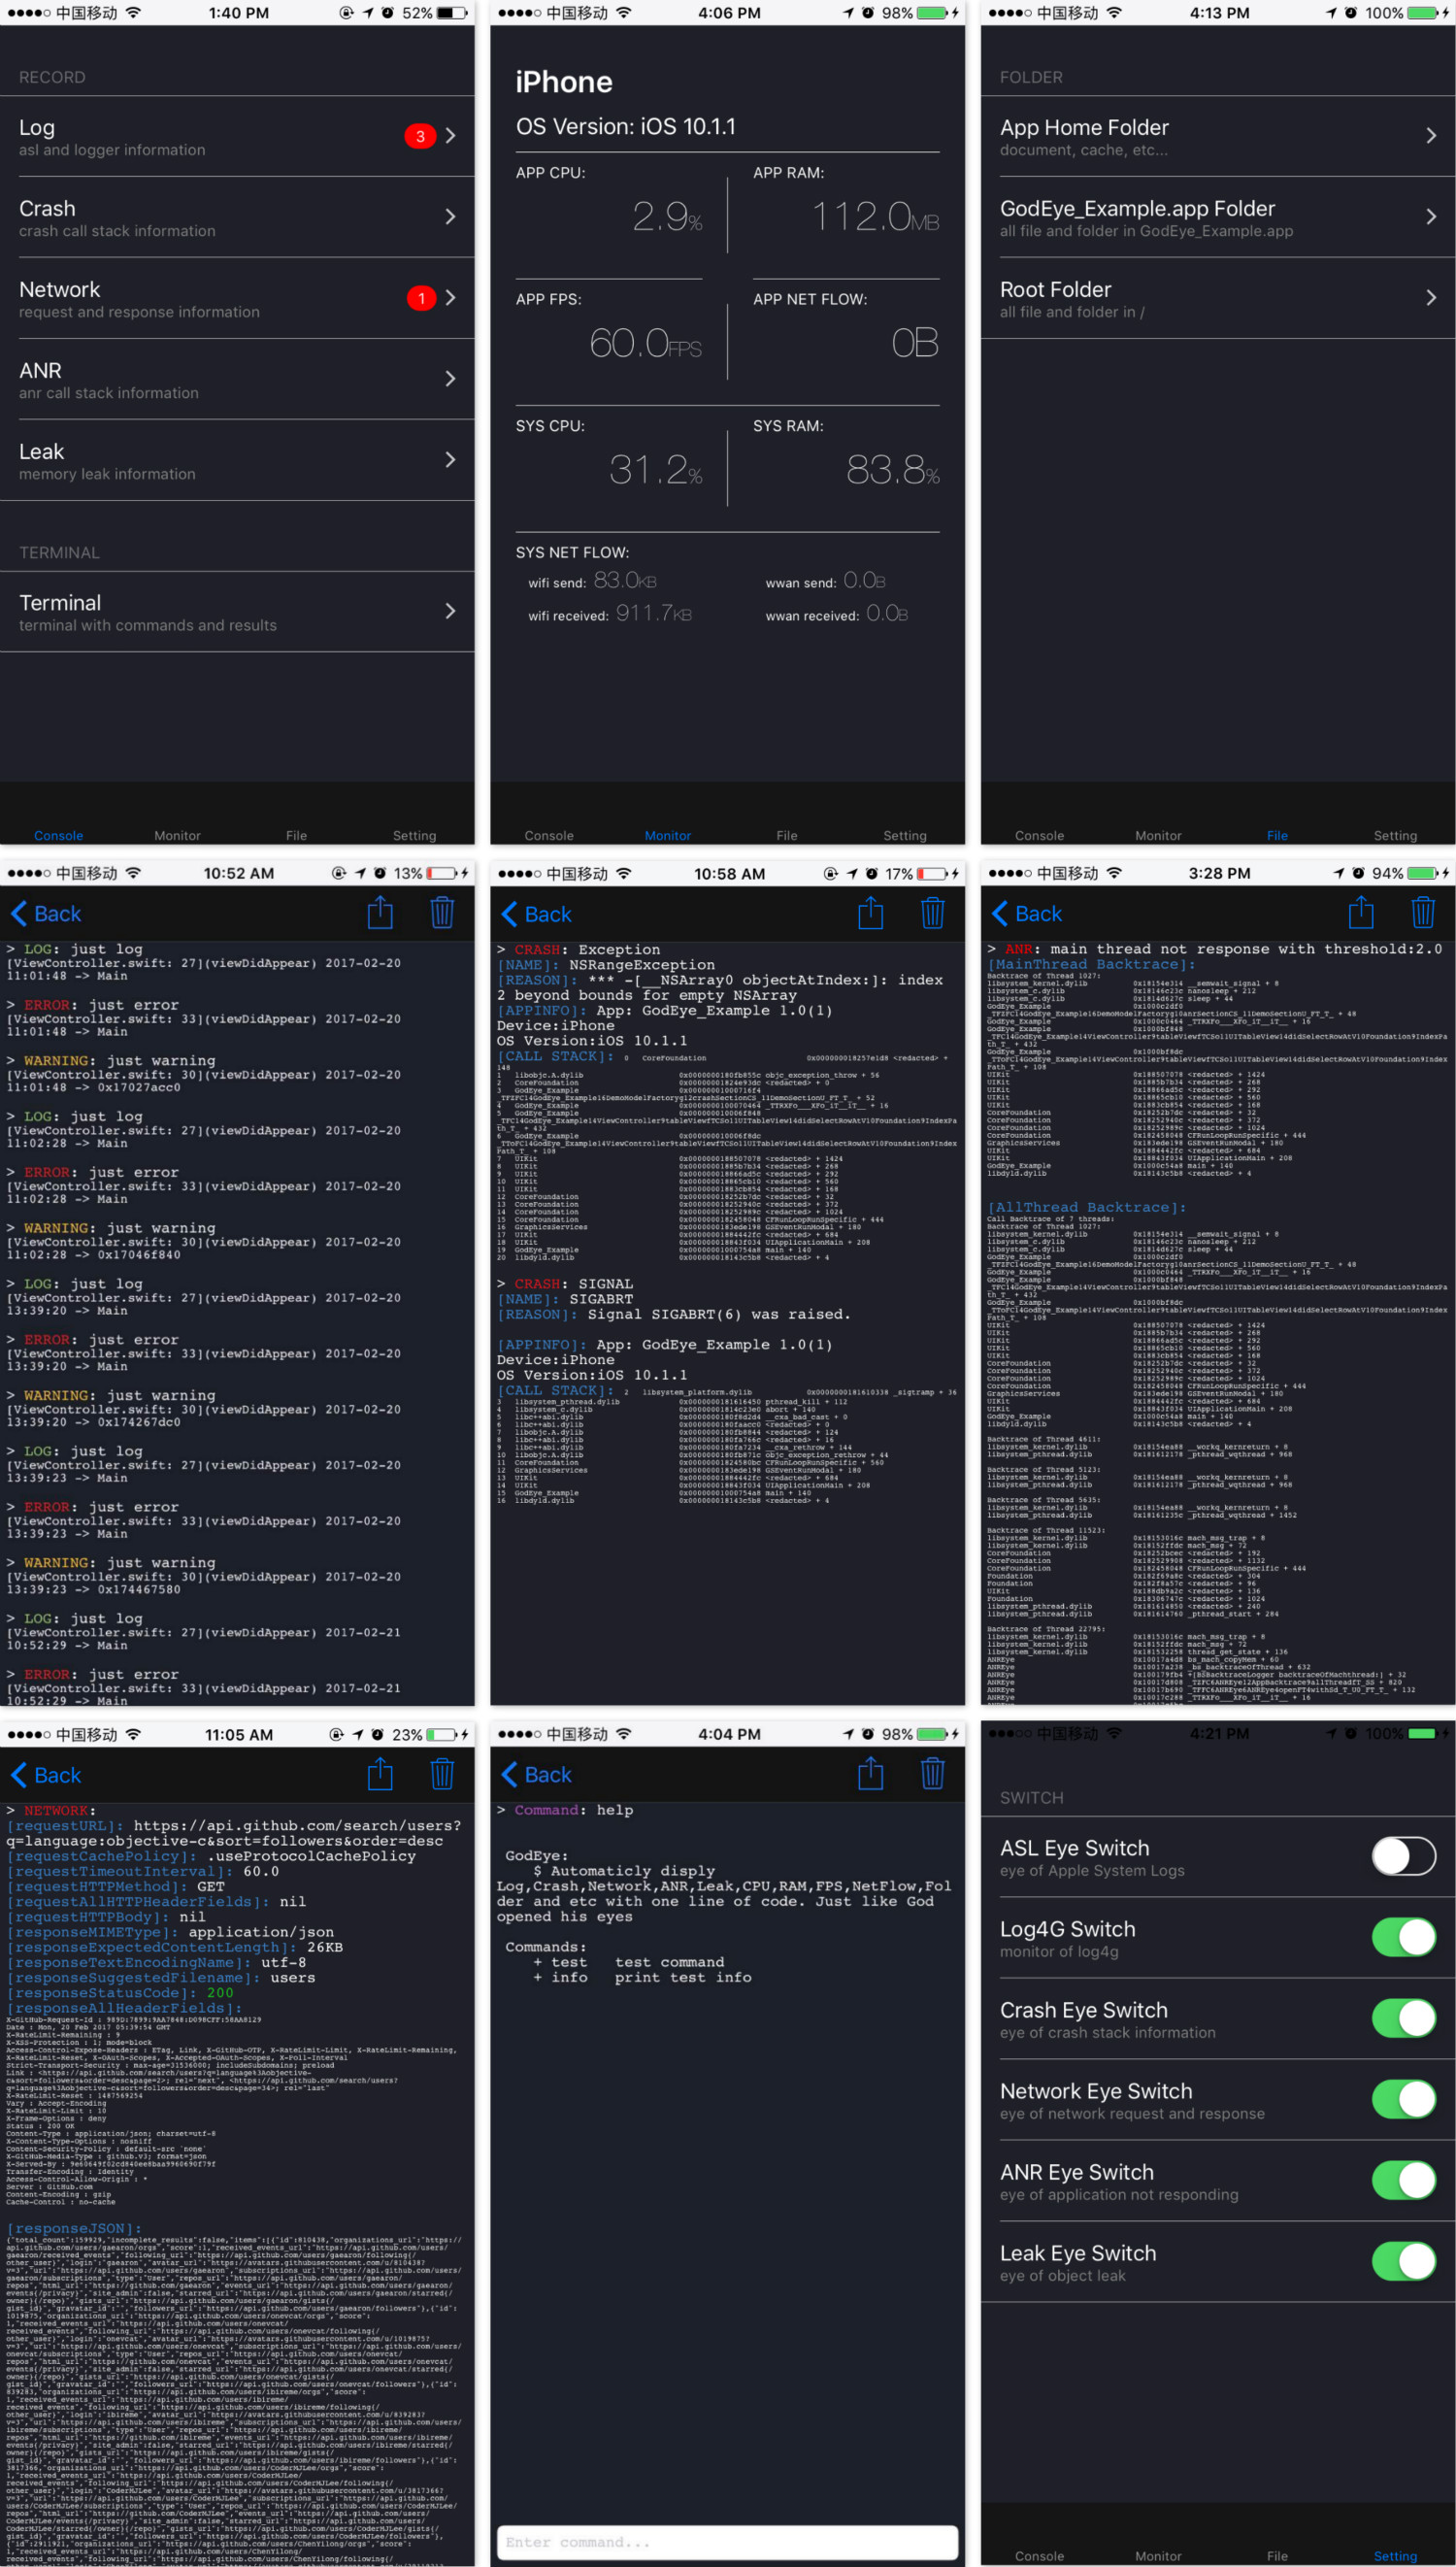
Automaticly display Log,Crash,Network,ANR,Leak,CPU,RAM,FPS,NetFlow,Folder and etc with one line of code based on Swift. Just like God opened his eyes.
It's so huge that I split it into several independent components:
- Log4G — Simple, lightweight logging framework written in Swift.
- AssistiveButton — Simple Assistive Button.
- AppBaseKit — A handy kit of Swift extensions and wrapped class to boost your productivity.
- AppSwizzle — lightweight and flexible method swizzling wrapped by swift.
- LeakEye — LeakEye is a memory leak monitor.
- NetworkEye — NetworkEye is a network monitor,automatic catch the request and response infomation of all kinds of request send.
- ANREye — ANREye is an ANR (Application Not Responding) monitor,automatic catch the ANR and return stacktrace of all threads.
- ASLEye — ASLEye is an ASL(Apple System Log) monitor, automatic catch the log from NSLog by asl module.
- CrashEye — CrashEye is an ios crash monitor,automatic catch exception crash & signal crash and return the stacktrace.
- SystemEye — SystemEye is a system monitor,automatic catch the infomation of cpu,memory....etc.
Features
- [x] monitor for the log and point out log type.
- [x] monitor for the crash, include Uncatched Exception and Signal.
- [x] monitor for the network, all information of request and response.
- [x] monitor for the ANR, tell you the stacktrace of all threads.
- [x] monitor for the memory leak, tell you the leak object's class name.
- [x] a terminal for you to customized your commands and things what to do.
- [x] monitor for the cpu usage of system and application.
- [x] monitor for the ram usage of system and application.
- [x] monitor for the FPS.
- [x] monitor for the netflow of system and application.
- [x] a file browser for look through the sandbox, .app and root directory.
- [x] custom and runtime setting
Characteristics
- [x] richly: comprehensive feature
- [x] conveniently: one line code access
- [x] automaticly: no code intrusion
- [x] safety: no compile code in release
Preview
Book and Principle
I has wrote a book named 《iOS监控编程》,each chapter records the course function of the implementation details and the way to explore.sorry for english friends,this book wrote by chineses.
Installation
Not build in Release
First, add configurations in Podfile.
pod 'GodEye', '~> 1.0.0', :configurations => ['Debug']Then, find Other Swift Flags in your target's Build Settings,add DEBUG in Debug scheme.
Finally, add DEBUG macro in makeEye:
#if DEBUG
    GodEye.makeEye(with: self.window!)
#endif
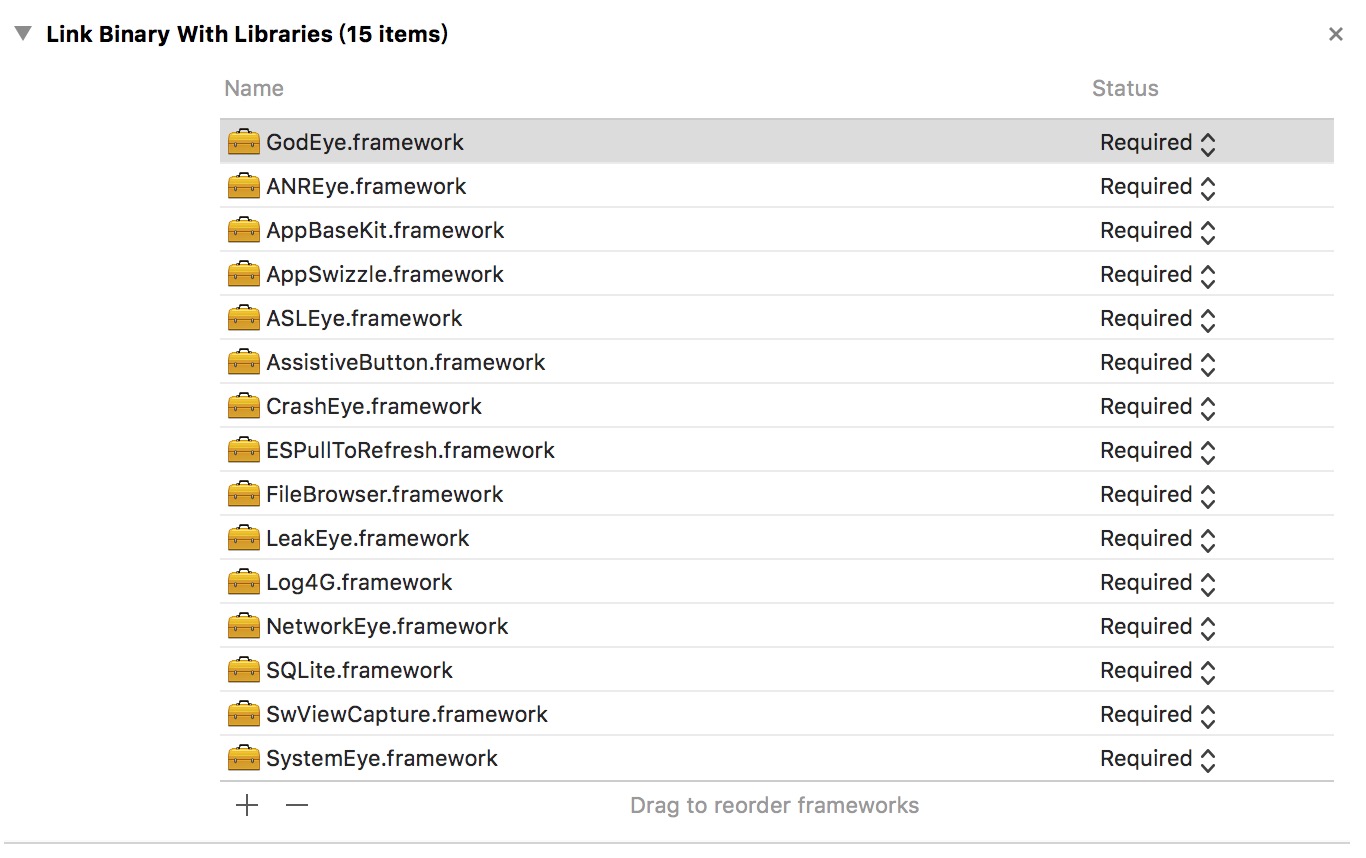
Add GodEye to Embed Frameworks
On your application targets’ “General” settings tab, in the “Embed Frameworks” section, drag and drop GodEye.framework from the Carthage/Build folder on disk.
Add Dependency to Linked Frameworks and Libraries
On your application targets’ “General” settings tab, in the “Linked Frameworks and Libraries” section, drag and drop the dependency framework used in GodEye from the Carthage/Build folder on disk.
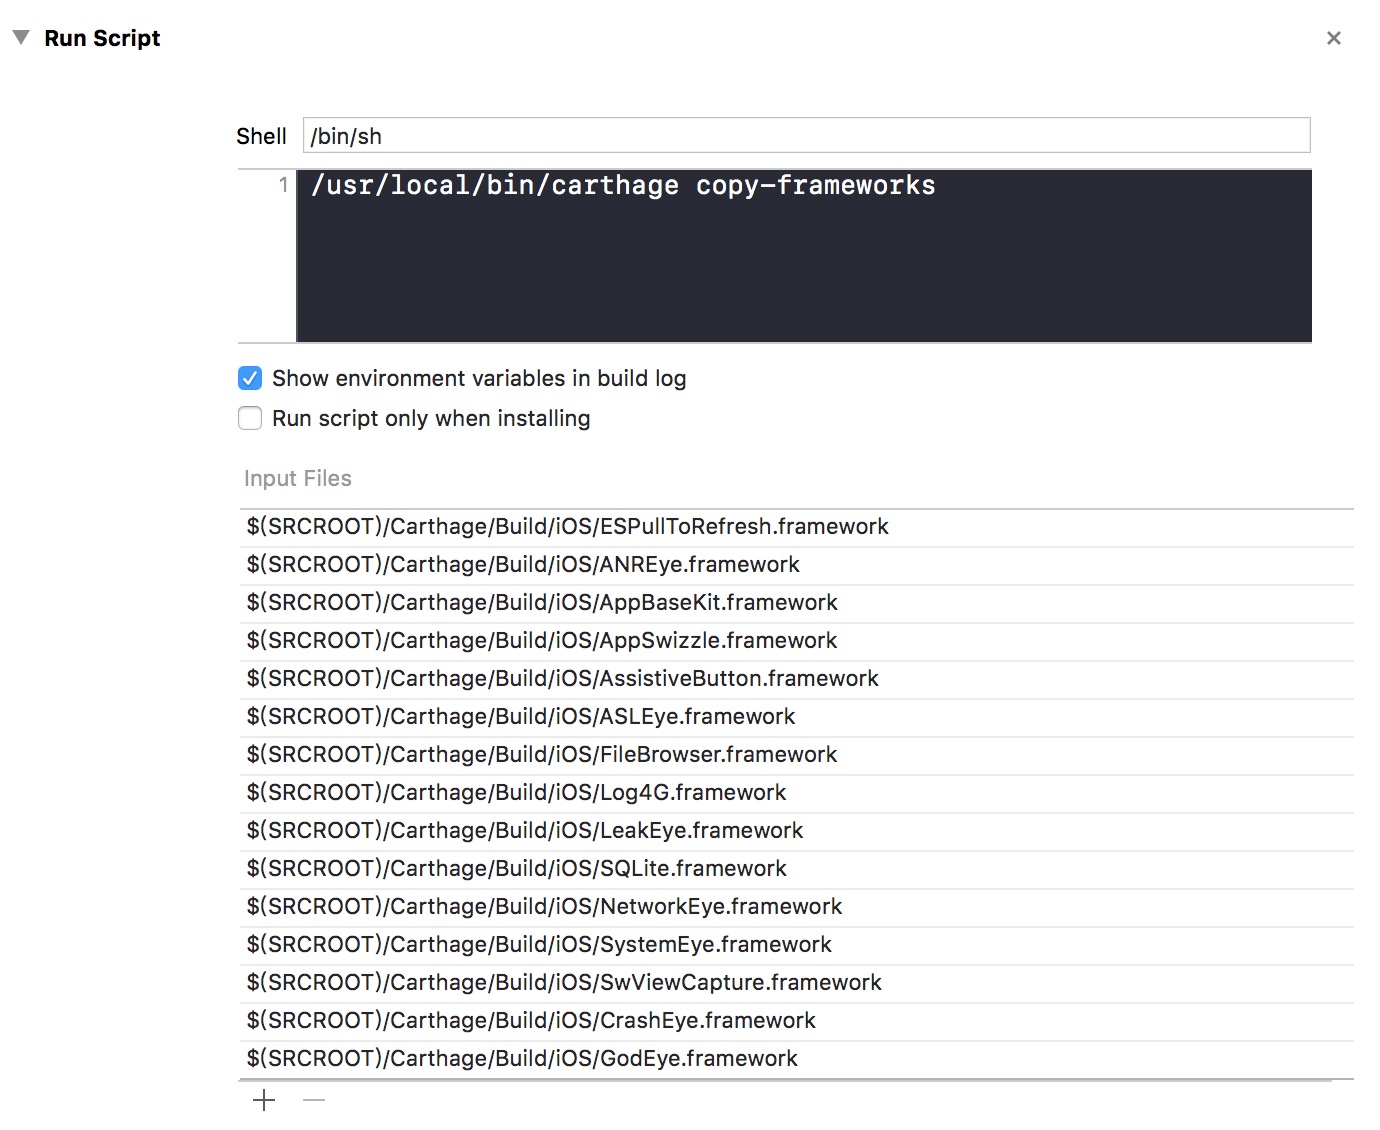
Add Run Script
On your application targets’ “Build Phases” settings tab, click the “+” icon and choose “New Run Script Phase”. Create a Run Script in which you specify your shell (ex: /bin/sh), add the following contents to the script area below the shell:
/usr/local/bin/carthage copy-frameworks
and add the paths to the frameworks you want to use under “Input Files”:
OpenSource Application Use GodEye
CocoaChinaPlus is an open source application wrote by swift, now the GodEye is work well in it!
Usage
import at AppDelegate:
import GodEyemaking GodEye at application:didFinishLaunchingWithOptions:
GodEye.makeEye(with:self.window!)well, make GodEye with one line code as above will use default configuration.We also can custom our configuration:
let configuration = Configuration()
configuration.command.add(command: "test", description: "test command") { () -> (String) in
    return "this is test command result"
}
configuration.command.add(command: "info", description: "print test info") { () -> (String) in
    return "info"
}

GodEye.makeEye(with: self.window!, configuration: configuration)
the example above is custom command configuration, we also can custom control and switch configuration.see detail at ControlConfiguration and SwitchConfiguration
Example
To run the example project, clone the repo, and run pod install from the Example directory first.
Author
twitter: @zixun_
email: [email protected]
github: zixun
blog: 子循(SubCycle)
Thanks
First is Github, it gives me a lot of ideas and inspiration, and even ready-made code:
- Log monitor inspired by AELog
- Crash monitor inspired by GT
- ANR monitor inspired by Watchdog
- Network monitor inspired by NetworkEye
Secondly is StackOverFlow, it answers a lot of problems encountered in the author's writing and development,here are a few images of deep:
- CPU usage of application:ios-get-cpu-usage-from-application
- CPU usage of system:get-cpu-percent-usage
Finally, thanks to several great blog:
- Memory Leak inspired by MrPeak's PLeakSniffer: http://mrpeak.cn/blog/leak
- wereadteam's MLeaksFinder: https://wereadteam.github.io/2016/02/22/MLeaksFinder
License
GodEye is available under the MIT license. See the LICENSE file for more info.


